
1994 S10 Blazer Tahoe LT - Revival


New Member
Joined: Nov 2017
Posts: 98
From: Colorado

You�re getting a lot more done than I have. Since you have to remove the steering box to get the pitman off, you�re better off for having replaced the box anyway. 3/4 to an inch of play is really good.
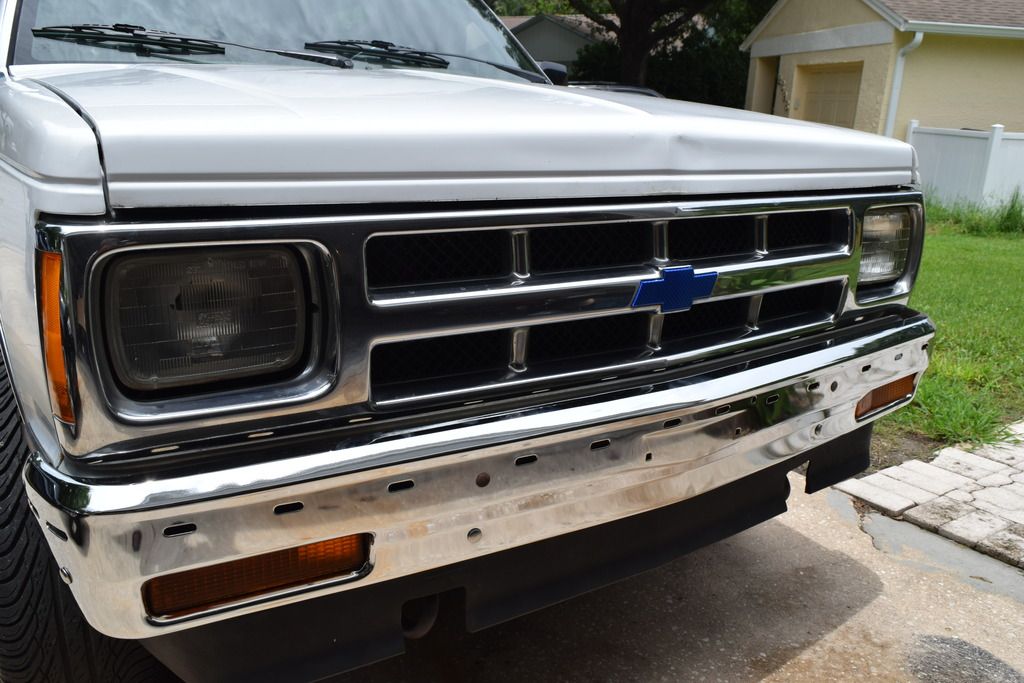
The front emblem looks awesome. There was a white Blazer identical to yours that was for sale at the same time as when I bought the Bravada. Sometimes I wish I would have bought that instead.
The front emblem looks awesome. There was a white Blazer identical to yours that was for sale at the same time as when I bought the Bravada. Sometimes I wish I would have bought that instead.
You’re getting a lot more done than I have. Since you have to remove the steering box to get the pitman off, you’re better off for having replaced the box anyway. 3/4 to an inch of play is really good.
The front emblem looks awesome. There was a white Blazer identical to yours that was for sale at the same time as when I bought the Bravada. Sometimes I wish I would have bought that instead.
The front emblem looks awesome. There was a white Blazer identical to yours that was for sale at the same time as when I bought the Bravada. Sometimes I wish I would have bought that instead.
Good point on the arm/box. . I'm glad I did it. Wasn't too much $$, in fact the Moog Pitman arm was almost as much as the box (after I get core deposit back).
Going to try to get the leafs and poly bushings done this week, crank t-bars to match. After that I want to fix my loose column (4 Tilt Mechanism Bolts), I believe that's part of the remaining play, will throw on the new grant wheel then too.
Once the lift is done then I can take it in for an alignment.
Glad you like the emblem. . I can't wait to see it with clear lenses out in the sunlight. . .we'll see how long I can resist the temptation to order them, but $70 seems like a lot for some plastic, considering I still have more important stuff to fix.
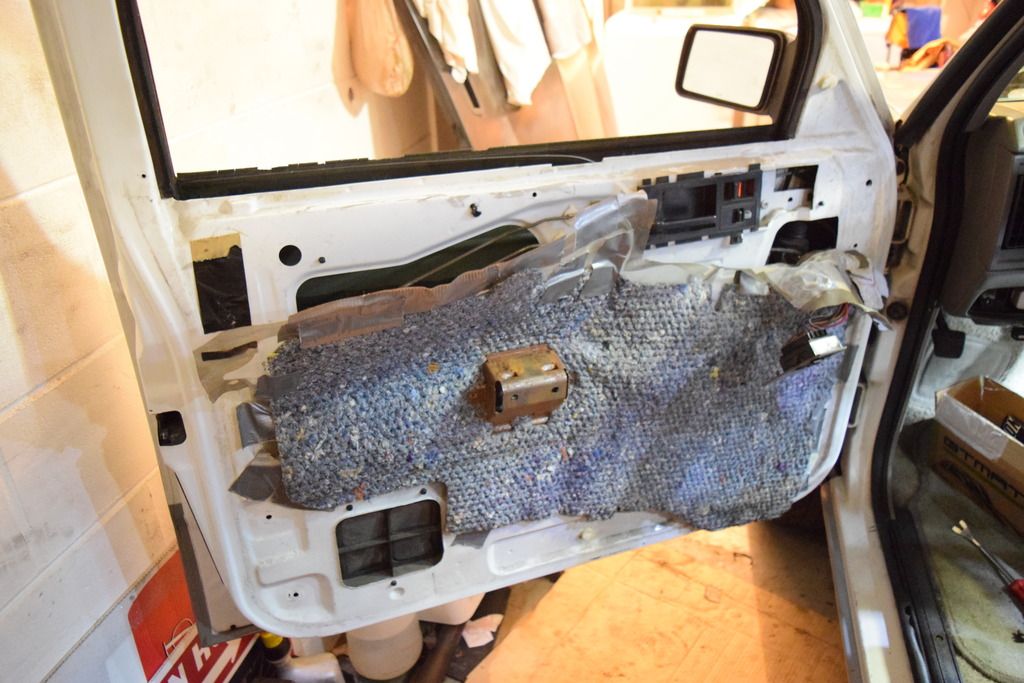
A little more work again this past week. I have finished going through both rear doors to add the GT Mat. I did the left rear, covering nearly every spot I could, then went back and added more to the right door that I did first.
I'm pleased to say both have a very solid "thud" sound now. . . sounds much more like my Audi doors.
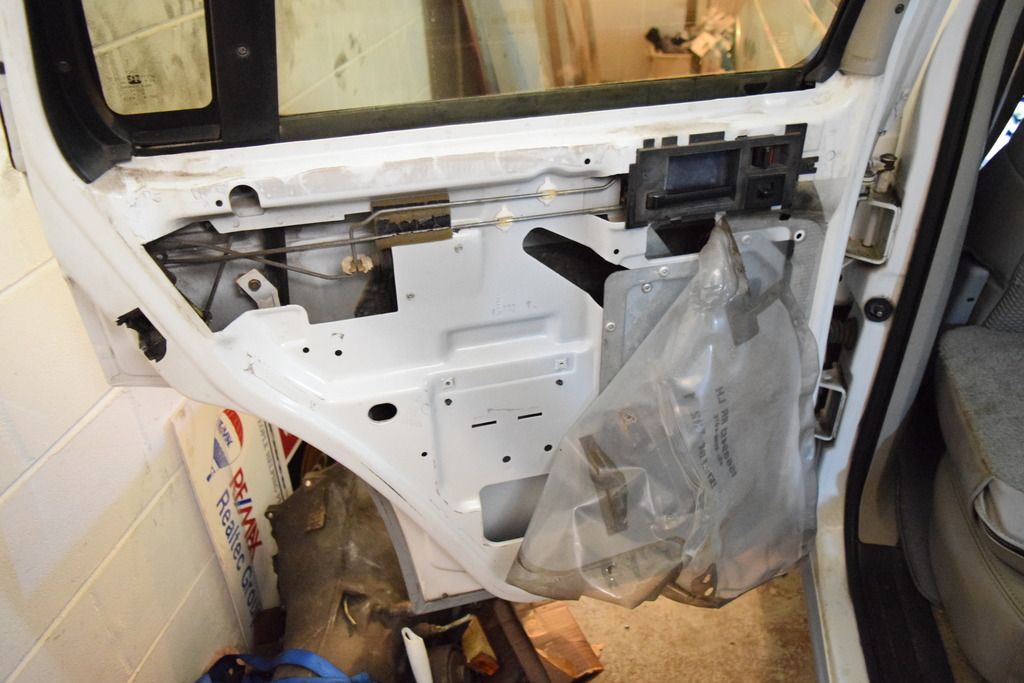
Here's the door cleaned up ready for insulation.
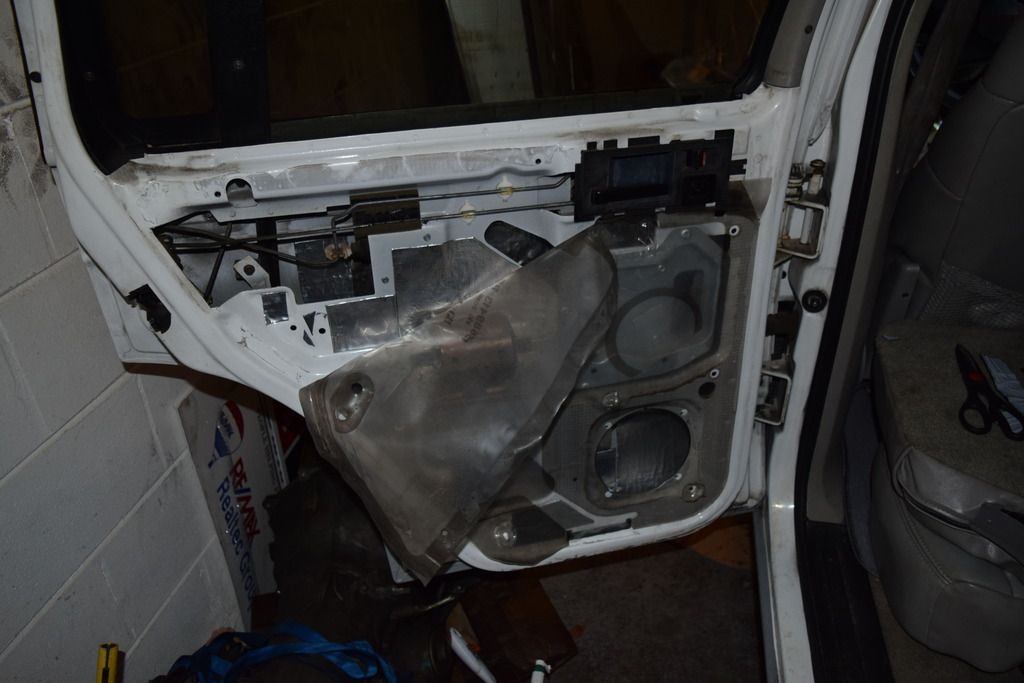
Here's almost done. . .I did both sides of the inner skin, and as much of the inside of the outer skin as I could.
I had some material left so went ahead and started on the driver door. . . . Found a nasty piece of berber carpet in there lol. . .must have been when someone replaced the window motor.
Took that mess out, and tightened the window motor, which was loose. I used the rest of my insulation to cover as much of the driver door as I could. Ordered some more gt mat, so once that shows up I'll get back in and finish the driver door and pass door.
After the improvement in the back doors I really want to get in and cover every inch of the interior in the stuff. . . . . eventually
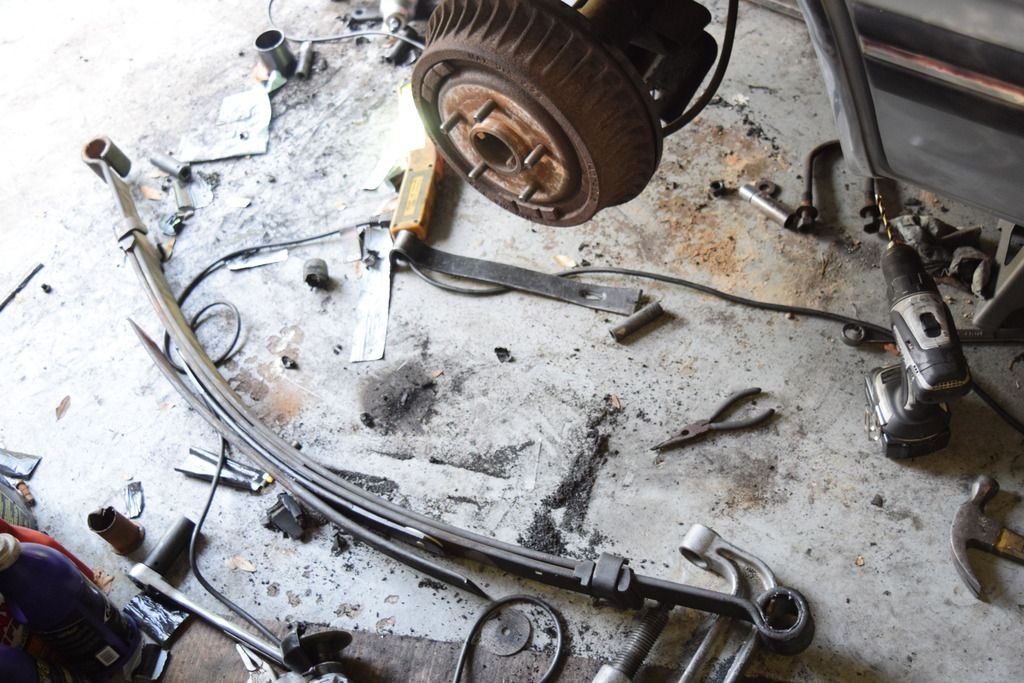
I also started on the leaf springs yesterday. Had a helluva time getting the bushings out. . .really don't like using a torch right next to the gas tank.
Just ran up to Harbor Freight to get an air hammer for the eye bushing sleeves, and of course the only thing in the store that was sold out were air hammers. Got a better set of chisels and punches since my other chisels are garbage.
I just got the 2nd eye bushing out on the first leaf spring, so need to clean up the frame bush sleeve, then I can start putting this side back together and start the other side.
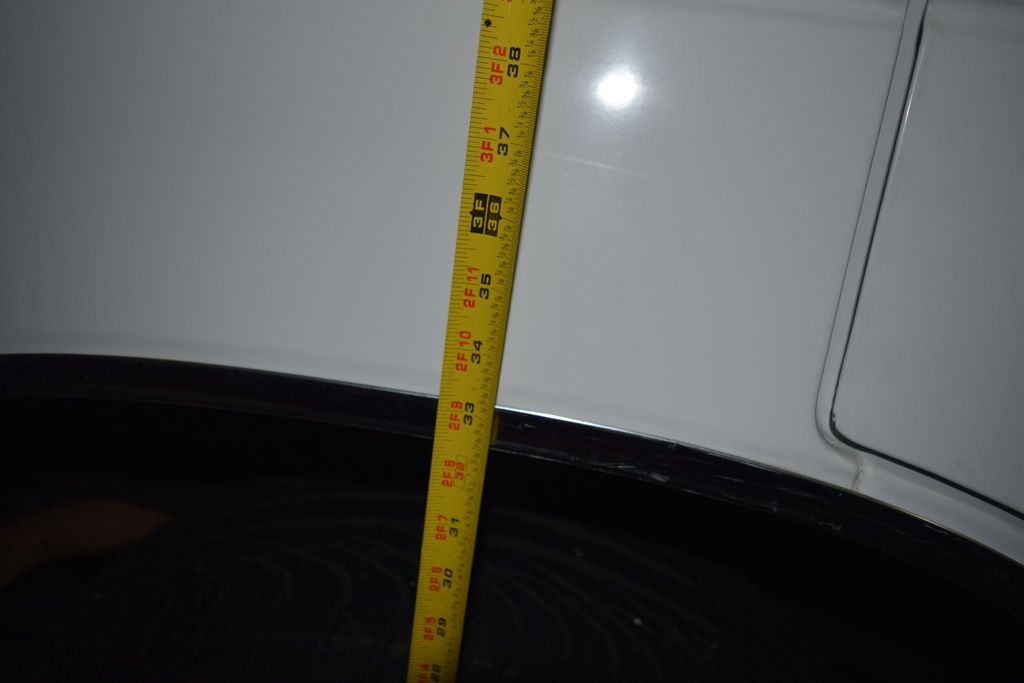
Here's my before measurement on Pass side. .
I believe I have the new leaf in the right spot here. . I wasn't 100% sure if the lower leaf was a helper spring, but it seems to be. . so I think this is correct.
I'm pleased to say both have a very solid "thud" sound now. . . sounds much more like my Audi doors.
Here's the door cleaned up ready for insulation.

Here's almost done. . .I did both sides of the inner skin, and as much of the inside of the outer skin as I could.

I had some material left so went ahead and started on the driver door. . . . Found a nasty piece of berber carpet in there lol. . .must have been when someone replaced the window motor.

Took that mess out, and tightened the window motor, which was loose. I used the rest of my insulation to cover as much of the driver door as I could. Ordered some more gt mat, so once that shows up I'll get back in and finish the driver door and pass door.
After the improvement in the back doors I really want to get in and cover every inch of the interior in the stuff. . . . . eventually
I also started on the leaf springs yesterday. Had a helluva time getting the bushings out. . .really don't like using a torch right next to the gas tank.
Just ran up to Harbor Freight to get an air hammer for the eye bushing sleeves, and of course the only thing in the store that was sold out were air hammers. Got a better set of chisels and punches since my other chisels are garbage.
I just got the 2nd eye bushing out on the first leaf spring, so need to clean up the frame bush sleeve, then I can start putting this side back together and start the other side.
Here's my before measurement on Pass side. .

I believe I have the new leaf in the right spot here. . I wasn't 100% sure if the lower leaf was a helper spring, but it seems to be. . so I think this is correct.

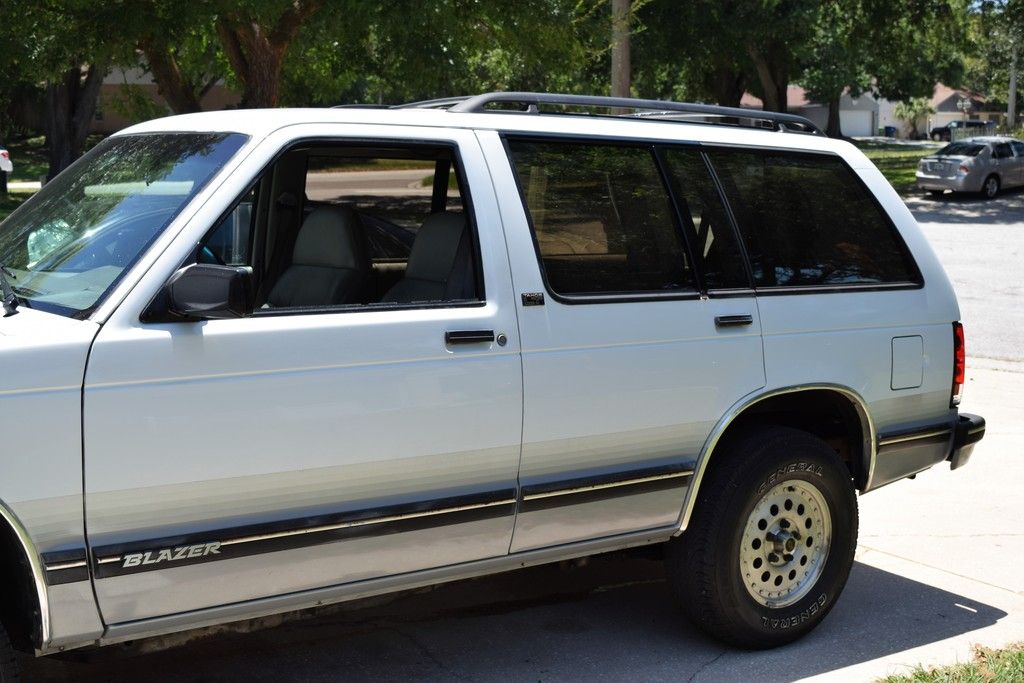
Well almost got it all done. Got as far as putting everything back together and dropping it down on the tires.
I still need to go back and tighten all the leaf spring/shackle bolts, but I wanted to see lol.
I'll take some pictures after it's all tight and I drive it some to settle, but it looks like I ended up with right around 1" of additional height in the rear, would have liked slightly more, but the spring rate feels better just jumping on the back of it.
That doesn't sound like fun. . .glad I didn't have to fabricate anything to get the job done.
Just ran out and tightened everything down.
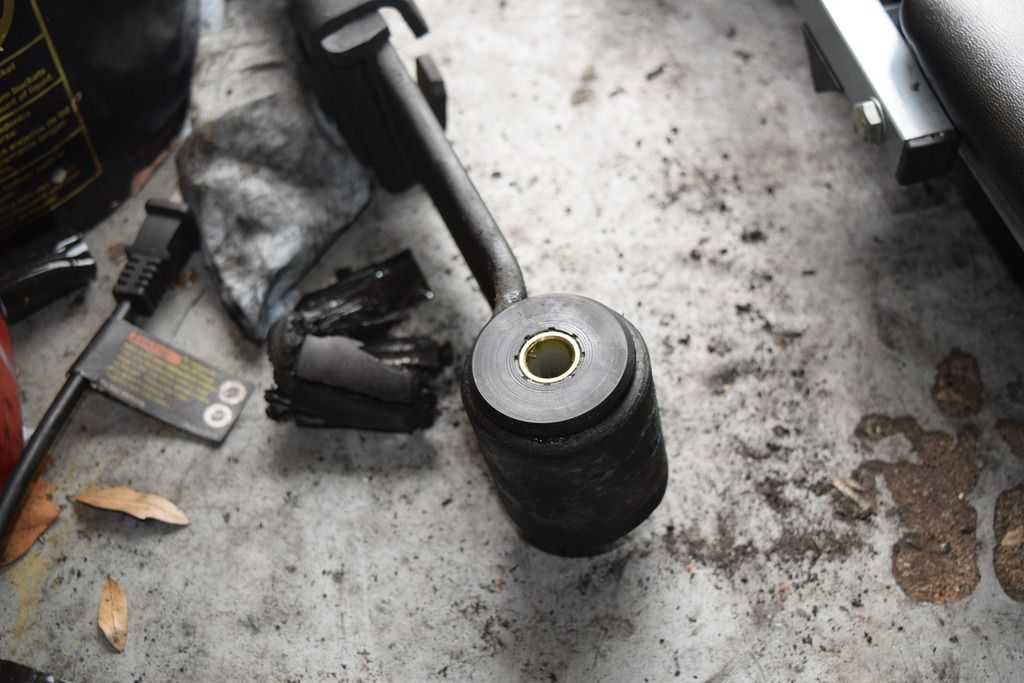
Here's a pic of the one of the prepared leaf spring eyes with bushing
Took it to run a couple errands. I'm pleased to say there is a pretty substantial improvement in the ride. . .the back end no longer wallows about when hitting bumps, or backing out of the driveway.
I still would have liked 1/2-1" more height out of it, but I'm not disappointed one bit. My fiance did immediately notice that it was taller than it was before.
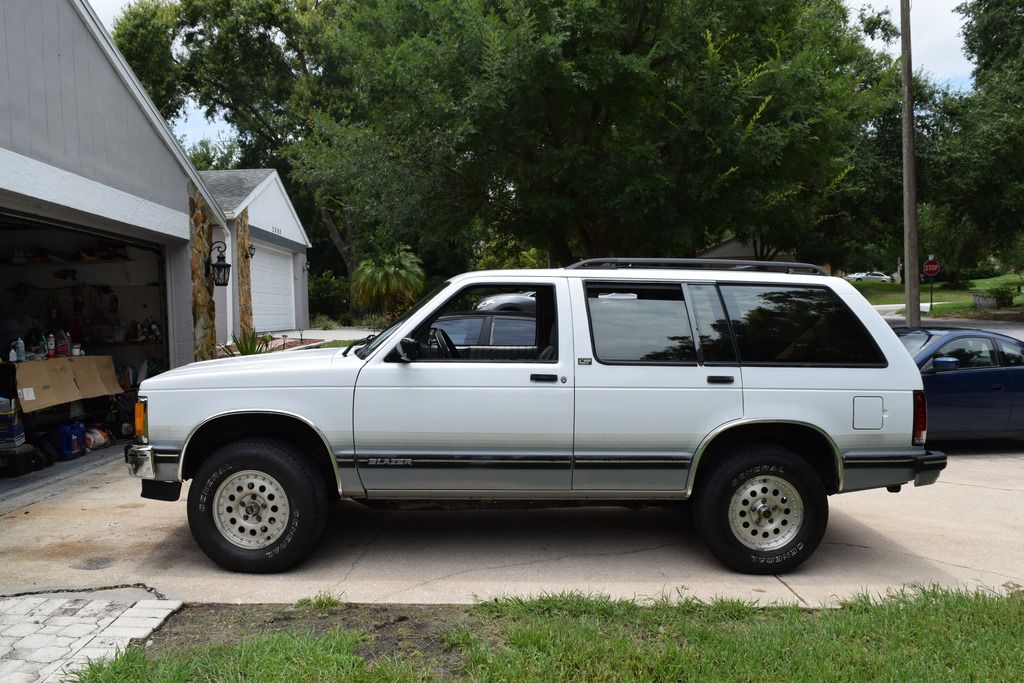
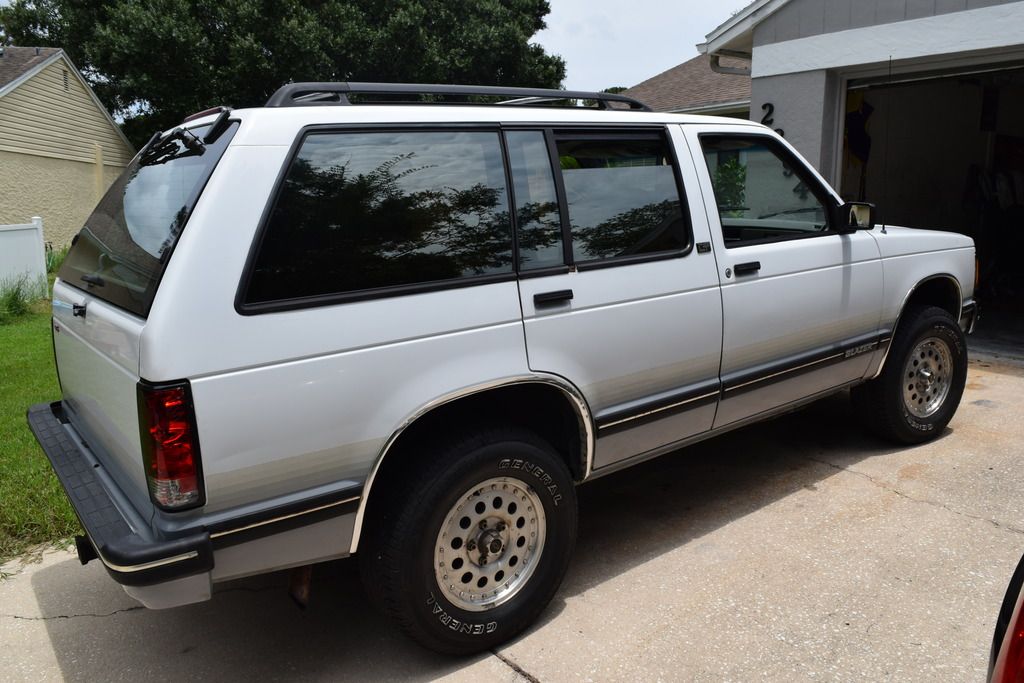
Here are a couple pics I took this afternoon, also got a better shot of the wrapped grill emblem.
Just ran out and tightened everything down.
Here's a pic of the one of the prepared leaf spring eyes with bushing

Took it to run a couple errands. I'm pleased to say there is a pretty substantial improvement in the ride. . .the back end no longer wallows about when hitting bumps, or backing out of the driveway.
I still would have liked 1/2-1" more height out of it, but I'm not disappointed one bit. My fiance did immediately notice that it was taller than it was before.
Here are a couple pics I took this afternoon, also got a better shot of the wrapped grill emblem.


Moderator
Joined: Nov 2007
Posts: 2,185
From: Zurich
Coming along nicely.
My rig has to hold up another year or two. Then the engine and transmission should be ready.
Will change suspension at the same time. I guess I should be starting spraying penetration oil now on some parts and bolts ...
My rig has to hold up another year or two. Then the engine and transmission should be ready.
Will change suspension at the same time. I guess I should be starting spraying penetration oil now on some parts and bolts ...
@error_401. . .Sorry to hear you're still so far out. . .I thought I waited a long time at almost a year, before being able to drive mine.
Still working on things here and there. . Been messing with alignment, but it's still not great. I need to pull the lower control arms to do those bushings.
I did add some more insulation over the weekend. Front Pass door now sounds about like a bank vault. You can feel it's heavier when opening/closing the door.
Door pull was cracked on pass side too, so used some JB weld to repair while I had it apart.
Only other thing I got done this weekend, was repainting part the door/window trim. . .Other than the roof rack bars, this was the worst spot cosmetically.
I didn't take pics of all the steps again, but here it is after two coats. . .
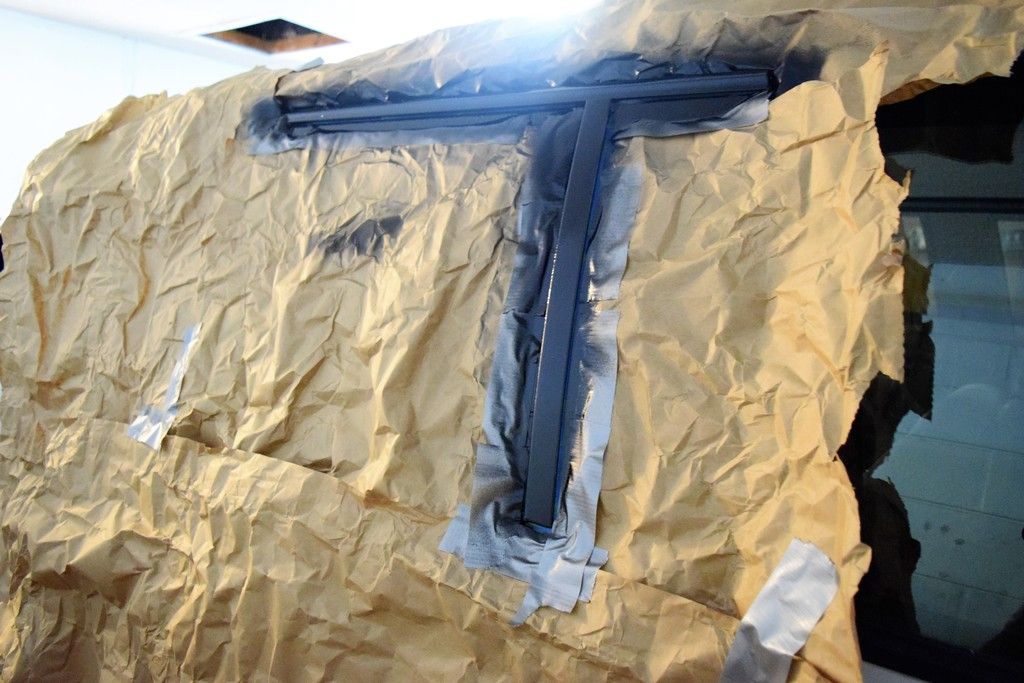
I used some 3M painters tape to tape it off then went back with some duct tape and paper to cover everything else.
Unfortunately I didn't get the surface as clean as I thought I did, and got some fisheyes . . . oh well. It's not perfect and will eventually need redone, but from 5+ Ft it looks much better than it did.
After:
Other than that I've just been driving it around town. Filled up the tank again this weekend. . .Up to about 13.5 MPG, still not great but about a 50% improvement in mileage from the last one.
I was also very surprised while driving it last weekend. . . going through the neighborhood I had a guy slow down in front of me, then pull over and flag me down. Lol I wasn't quite sure what he wanted at first, but he waved me over to ask about the Blazer! He was very impressed with how clean it is. . .kind of asked me about selling it, but told him I wasn't interested. . . I guess I should have told him like $10k lol.
Still working on things here and there. . Been messing with alignment, but it's still not great. I need to pull the lower control arms to do those bushings.
I did add some more insulation over the weekend. Front Pass door now sounds about like a bank vault. You can feel it's heavier when opening/closing the door.
Door pull was cracked on pass side too, so used some JB weld to repair while I had it apart.
Only other thing I got done this weekend, was repainting part the door/window trim. . .Other than the roof rack bars, this was the worst spot cosmetically.
I didn't take pics of all the steps again, but here it is after two coats. . .

I used some 3M painters tape to tape it off then went back with some duct tape and paper to cover everything else.
Unfortunately I didn't get the surface as clean as I thought I did, and got some fisheyes . . . oh well. It's not perfect and will eventually need redone, but from 5+ Ft it looks much better than it did.
After:


Other than that I've just been driving it around town. Filled up the tank again this weekend. . .Up to about 13.5 MPG, still not great but about a 50% improvement in mileage from the last one.
I was also very surprised while driving it last weekend. . . going through the neighborhood I had a guy slow down in front of me, then pull over and flag me down. Lol I wasn't quite sure what he wanted at first, but he waved me over to ask about the Blazer! He was very impressed with how clean it is. . .kind of asked me about selling it, but told him I wasn't interested. . . I guess I should have told him like $10k lol.

Back at it again. I'm to the point where prior laziness, and being cheap is biting me in the behind.
Started disassembling the front suspension again. . to do the lower control arm bushings. I've discovered my lower ball joints. . at least the pass side I have out so far. . . are horrendously worn. Wishing I would have just done all of this the first time I had the suspension apart, but I get to do it again. I went ahead and ordered a new wheel bearing/hub for the driver side since I'm going to have it apart. I did the pass side a while back.
At least I've found the worst remaining part of the steering/suspension I haven't changed yet.
Definitely the original lower ball joints too, so 232,xxx miles on them.
I ended up unbolting the lower ball joint to swing the knuckle out, so that I could lower the CA and release the pressure from the torsion bar. . . had to take a break there, it's so effin' hot.
Trying to get all of it done this week, so I can finally take it in for an alignment next week.