
Altoncustomtech's 2001 Jimmy = slow audio build

This makes me cant wait until I get the components for the jimmy. I actually blew one of the front dash 4x6ers. its driving me nuts, too many things on my plate right now to deal with that so I might just get some pioneers for the time being, 39 on amazon...
But man, I need the funds and the resources that you have.
Killer.
But man, I need the funds and the resources that you have.
Killer.
Thread Starter
|
Senior Member
Joined: Oct 2010
Posts: 931
From: Monroe City, IN

I hate blowing speakers. The components in my wife's van are nearly completely done. They've done well though considering we've had them in there for over 5 years and she's been beating the holy hell out of them from day one.
There's nothing wrong with getting something cheap for the temporary run but in your case, if I remember the list of components we have discussed in the past, it wouldn't be a great deal more to get the components would it? It's not like we were discussing $400 sets. If you could hold out long enough to fill up the "SPEAKER FUND" jar then it would save you from spending $40 now and the additional money on the components later leaving you with a pair of speakers that you're not using and cannot get the full $40 back out of again. If it's going to take longer than you're willing to hold out for then $40 isn't any big deal.
Funds and resources? Don't go thinking I got it easy, LOL! I'm living paycheck to paycheck like most people. It's only been in recent years I've been able to do builds like I've dreamed of since I got into car audio.
Well, the components I want are 60, then to get the kicks decent to sound better is more money, adds up quick.
and I more so meant resources over funds, as the fund I personally wish I had a lot more of LOL!
When do we get a video of that box?
and I more so meant resources over funds, as the fund I personally wish I had a lot more of LOL!
When do we get a video of that box?
Thread Starter
|
Senior Member
Joined: Oct 2010
Posts: 931
From: Monroe City, IN
It sure can, but getting them bought gets your foot in the door faster.
LOL, I wish I had more in the funds department too. I can't believe how much this engine replacement is nickel and dimeing me. After getting the old one out I found the motor mounts are bad. When taking off the exhaust manifolds one bolt had to be cut off and a few others were almost stripped at the head (pretty much expected that though). Also have to get a new oil pressure sending unit, still not sure how it got broke yet. All that along with the new oil cooler lines, oil cooler (whole radiator in the case of these trucks), and oil pump screen as required by the engine warranty. Also had to get a new power steering pump and pulley (long story). I don't mind spending money to do something right but this is starting to get ridiculous.
As for the resources, I am VERY fortunate to have friends/co-workers that are as willing to jump in and help, even on personal projects, like these guys are. I'm also very fortunate to work at a place that has the tools and room to do this kind of work. Yeah, I kinda luck out on that.
You'll get a video when the Jimmy is running again. I'll post a few pics up when I get the sub mounted and the PR's ready to tune, but past that there's no way I can continue to work on it until I can hook it up to the amp in the Jimmy and I can't do that until it's running.
Thread Starter
|
Senior Member
Joined: Oct 2010
Posts: 931
From: Monroe City, IN
Well, just a quick update. The old motor is all crated up and ready to go back for the core return. Me and the co-worker that's been helping me couldn't see anything immediately wrong with it. I think since I shut it off as soon as I heard the squeal and knock it didn't have a chance to make the damage noticeable. From our quick inspection though I couldn't find a rod bent or see which bearing it was that had begun to score the crank. I suppose with the water it could have been a main bearing but that wouldn't explain the knock.
The new engine has the new oil pump, new pick up screen, new timing cover, the oil pan, valve covers, dip stick, plug wire frames, water temp sensor, new motor mounts and flywheel on/in it. I still need to get the exhaust manifolds, lift bracket, remote oil filter adapter and harmonic balancer/crank pulley put on it then it's ready to drop back into the truck. We spent a lot of time at the parts cleaner cleaning up the valve covers, oil pan and remote oil filter adapter too. I am going to replace all the vacuum lines first and take a hammer to the firewall where it's too tight for those side upper bell housing bolts before dropping the engine back into it.
I also bought an aftermarket trans cooler for it and a new aluminum distributor from Skip White Performance too. I didn't know if they would be necessary or not but I picked up new exhaust donut gaskets for where the manifold mates with the pipe, new intake manifold bolts, and a host of other little things. Hopefully this engine lasts a long, long, long time, lol.
Last edited by altoncustomtech; Aug 17, 2013 at 11:08 AM.

Thread Starter
|
Senior Member
Joined: Oct 2010
Posts: 931
From: Monroe City, IN
Thread Starter
|
Senior Member
Joined: Oct 2010
Posts: 931
From: Monroe City, IN
Well, with all the necessary parts in hand finally, the last of the reusable parts cleaned up and installed on the engine, and the vacuum lines finally replaced in the truck, the process of installing the new engine can actually begin. And has.
I don't know how anyone could possibly replace the vacuum lines with the engine and transmission bolted into place. I had a tough enough time doing it with the engine out and the front of the transmission lowered down. I managed to get it done, every rubber vacuum and vent line under that hood has been replaced with a brand new one. My 4WD and heater/AC controls should work wonderfully well now that the vacuum can actually reach the locations it was supposed to. I could see them collapsing under the vacuum before, shouldn't be a problem now. I also tested the 4WD actuator under the battery tray as well with a vacuum pump here at work to verify it was in good shape.
On to a few pictures for the fun of it.
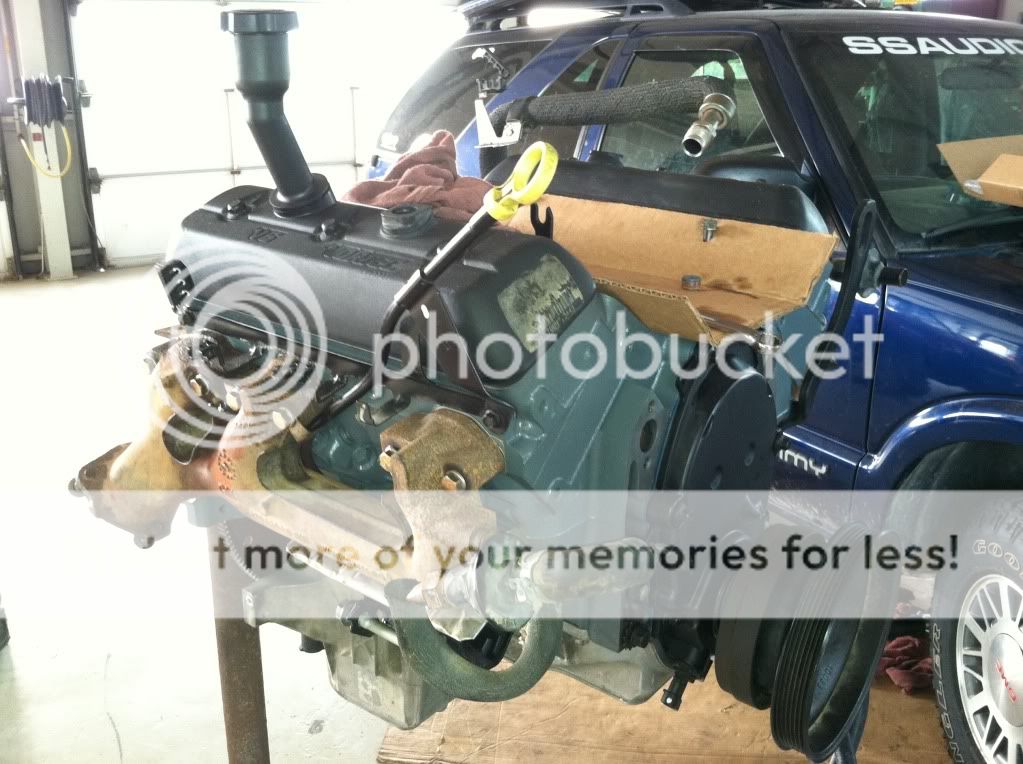
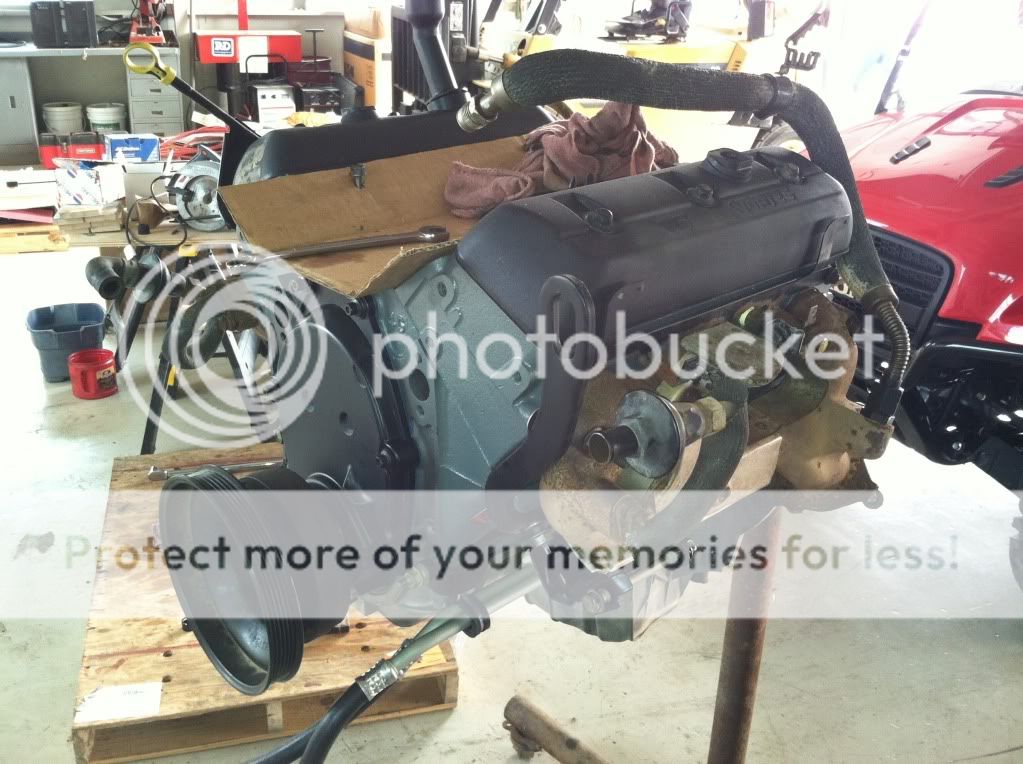
Here's the reman engine on my dad's old engine stand he built himself when he was doing all his engine/transmission work. It's pretty damn sturdy, though this V6 wasn't any sort of load for it really.
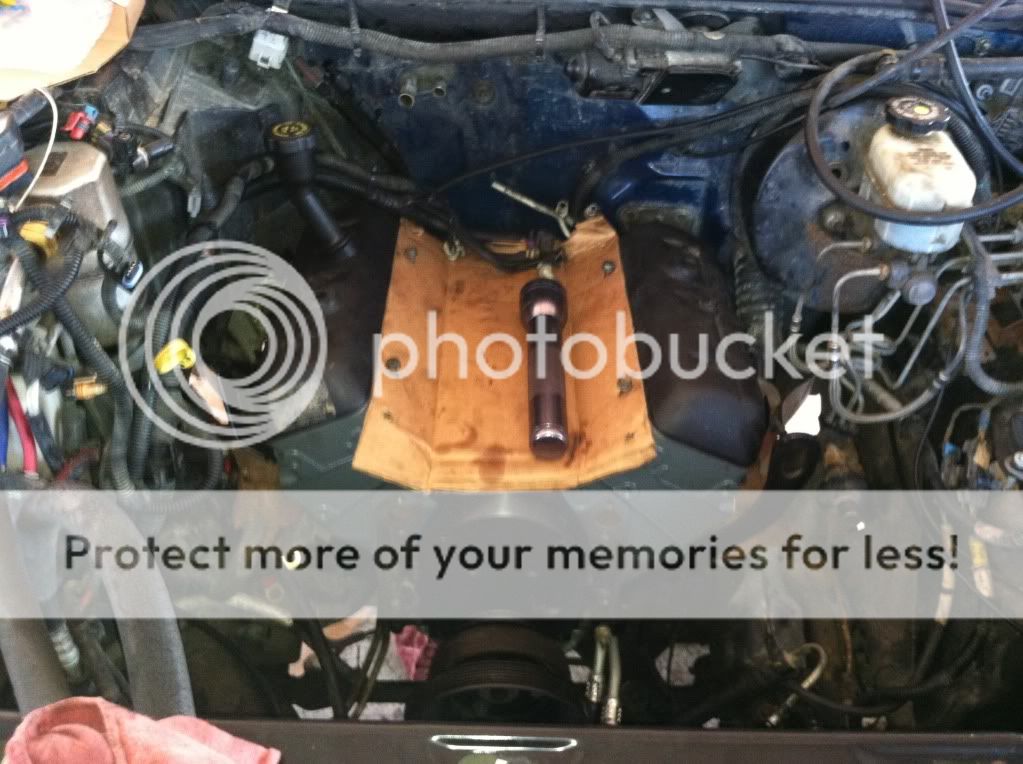
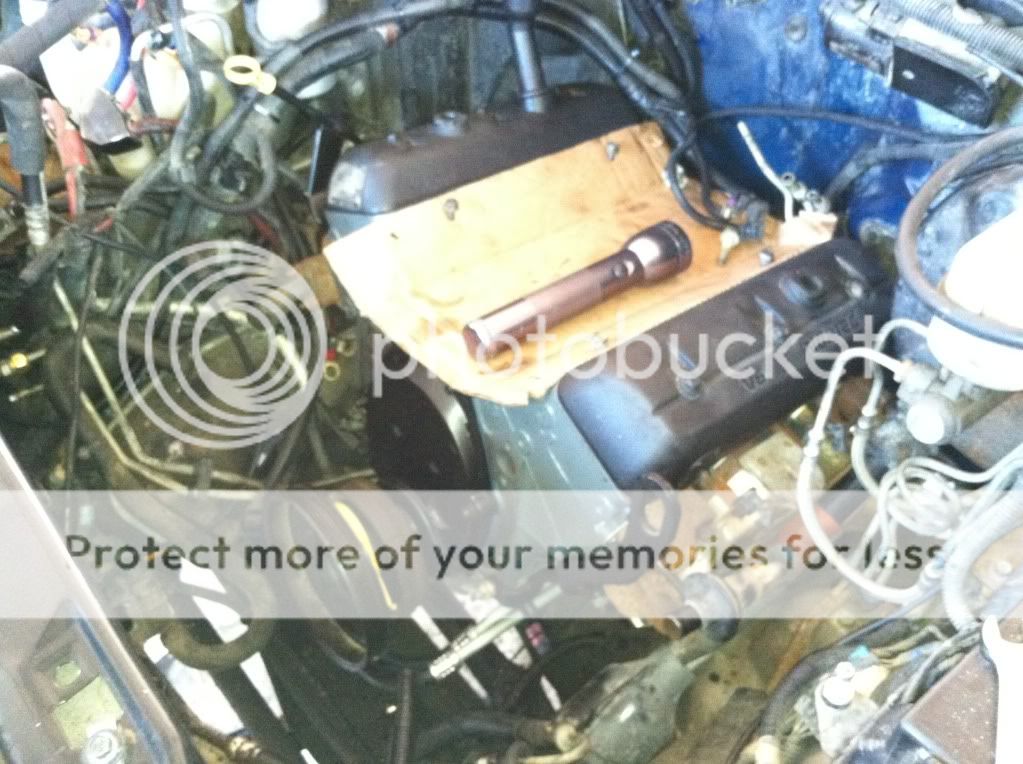
Here's that engine dropped down into the truck. At this point it has 6 of the 9 bolts that connect the trans to the engine on the bell housing along with the motor mount bolts in it. There's still a lot to do but I think I can call this making some progress!!!!
I don't know how anyone could possibly replace the vacuum lines with the engine and transmission bolted into place. I had a tough enough time doing it with the engine out and the front of the transmission lowered down. I managed to get it done, every rubber vacuum and vent line under that hood has been replaced with a brand new one. My 4WD and heater/AC controls should work wonderfully well now that the vacuum can actually reach the locations it was supposed to. I could see them collapsing under the vacuum before, shouldn't be a problem now. I also tested the 4WD actuator under the battery tray as well with a vacuum pump here at work to verify it was in good shape.
On to a few pictures for the fun of it.
Here's the reman engine on my dad's old engine stand he built himself when he was doing all his engine/transmission work. It's pretty damn sturdy, though this V6 wasn't any sort of load for it really.


Here's that engine dropped down into the truck. At this point it has 6 of the 9 bolts that connect the trans to the engine on the bell housing along with the motor mount bolts in it. There's still a lot to do but I think I can call this making some progress!!!!


Thread Starter
|
Senior Member
Joined: Oct 2010
Posts: 931
From: Monroe City, IN
OK, GREAT NEWS!!!! Got the engine completely back into the truck yesterday, everything on it, timing set and the engine test ran. Things went very well with it, it started and ran without much of a problem through the initial start up period and it drove around just fine after that. The only problem with the whole thing is that it appears I didn't get quite enough RTV on the very bottom of the timing set cover where it meets the oil pan and I have a fairly good oil leak right there. It shouldn't be too tough to lower the oil pan back down, clean off the oil and reseal it all while it's in the truck so I'm not too terribly worried about it. Couple that with the fact the enclosure is done and the PR's ready to tune and it's been a good week! Here's a few pics for the fun of it.
The engine as everything sits right now. Simply unreal how long this has taken and how much work has been done.

This pic turned out nasty, but it gives a great overall view of how it looks. Even came out pretty damn close to what I had envisioned.
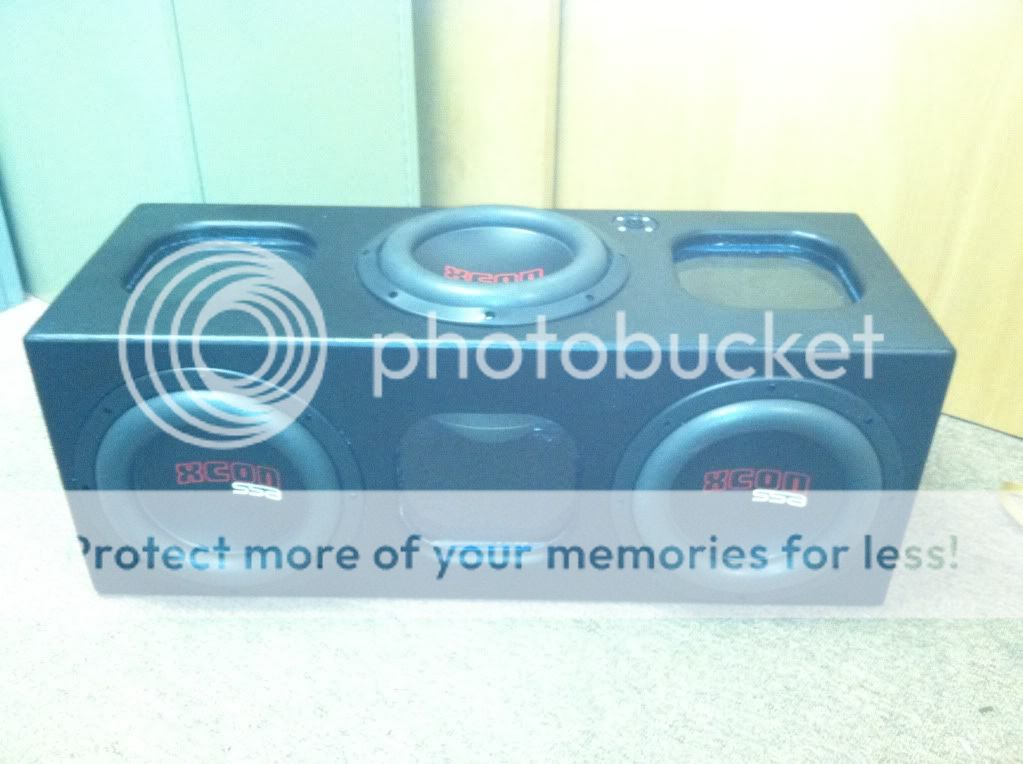
Here the motor of that XCON can be seen through the plexi, per it's design.

It will be so much fun to try to explain to people that there's only one sub in the box and then see the look on their faces when they look through the windows on the top and get this POV.

Well, finally some good forward movement!!