
Green Eggs & Ham

Thread Starter
|
BF Veteran
Joined: Jan 2008
Posts: 2,750
From: Southern, Alberta

Thanks for the compliments. Its true that my boys are quite the hooligans. Having 3 sons makes for lots of noise and destruction. They love playing in my Blazer, and every time I'm working on it they come and ask if they can help. Every time I bring home a new part they take my old drill and wire wheel and clean up the rust and flaked paint. Its nice because all I have to do is the touch up and paint.
thats good to have them help, mine will be involved more with age i hope. (3 and 6)
my daughter is the oldest, was interested for awhile....i have lost her to princes life though. my son has potential...he loves getting dirty with his toddler tool set.
it helps you and gives them some good lifetime skills.
my daughter is the oldest, was interested for awhile....i have lost her to princes life though. my son has potential...he loves getting dirty with his toddler tool set.
it helps you and gives them some good lifetime skills.
Thread Starter
|
BF Veteran
Joined: Jan 2008
Posts: 2,750
From: Southern, Alberta
Well, after a lot of struggles and delays I got my spare tire carrier mounted. I've been working on it for just over a week. Actual work time it probably took about 4-5 hours. Having 3 young boys makes for lots of delays and sidetracks.
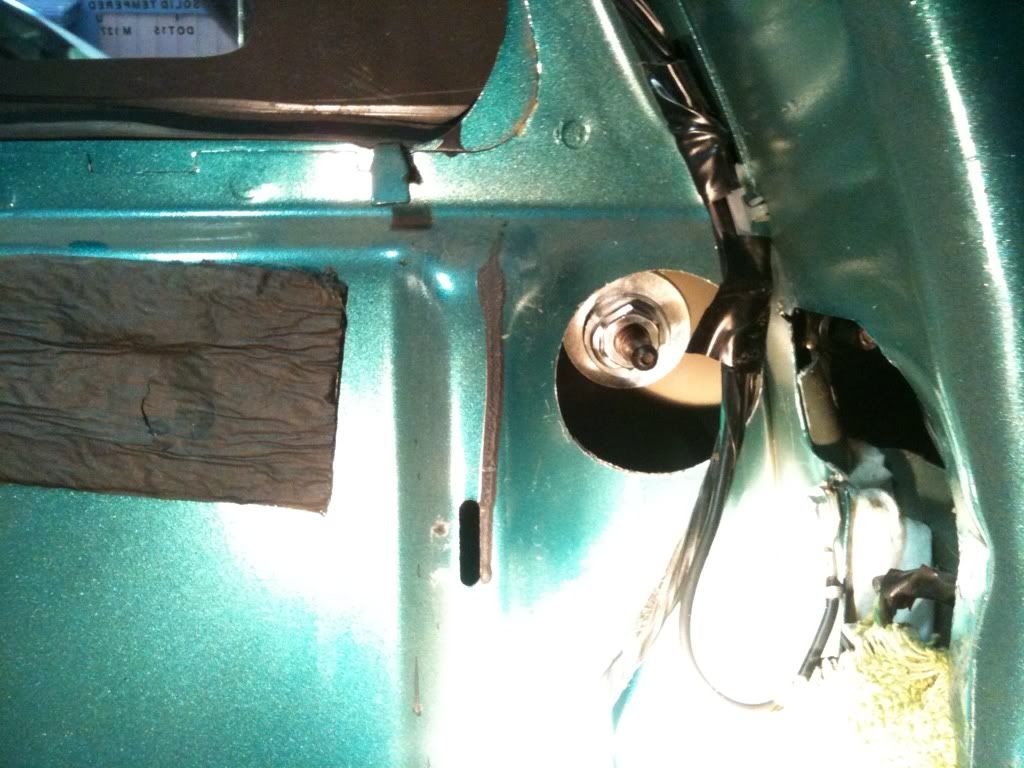
Like most of the people on here, I took a slightly different approach to bolting the rack on. I had a really hard time getting a drill though both panels for the upper and lower front mounting holes, so I decided to just bolt it to the skin using a shorter bolt, and a large fender washer, followed by a regular washer and a lock washer. I used a bimetal hole saw to drill an access hole to put the washer's and nut on the bolt. I didn't take a ton of pictures because I think that the how-to thread has tons already, but here's a few:
The upper front bolt:
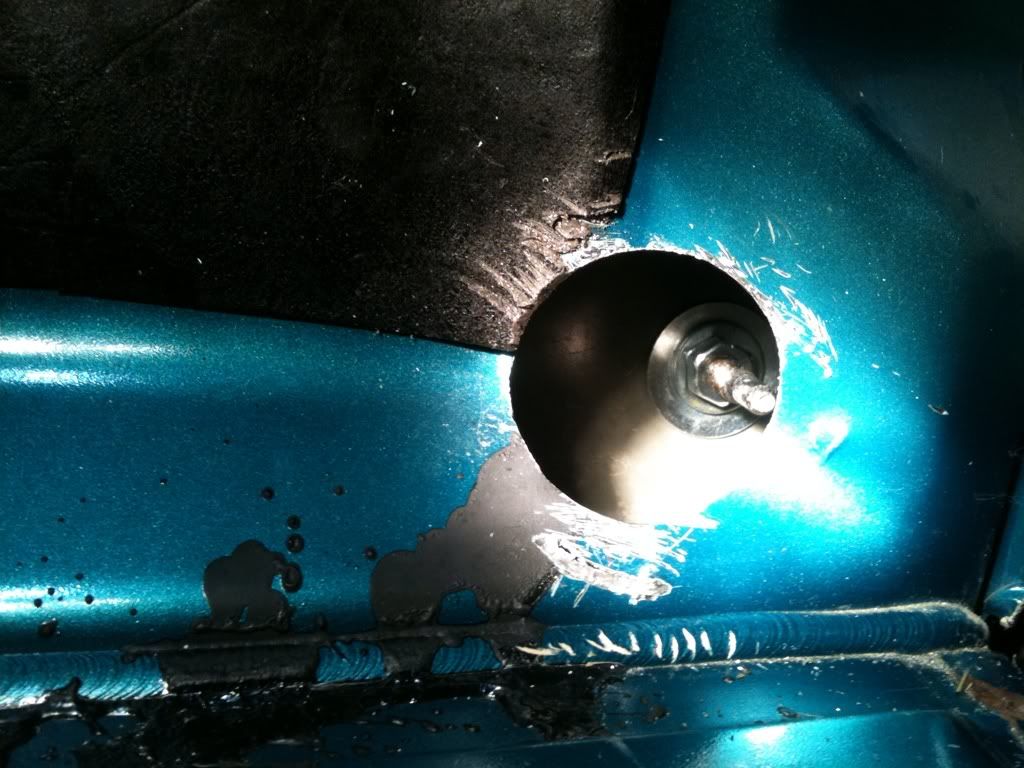
Lower front bolt:
One of the problems I ran into was apparently the rack shifted while I was drilling the bolt holes, and I ended up with the back bolt holes about 1/8" higher than the front ones. The lesson I learned from this is that 1/8" difference between 2 bolts about 3" apart turns into 3/4" at the end of a 3 foot long arm.


So I had to elongate a couple of the bolt holes about 1/8" to get it to sit right.
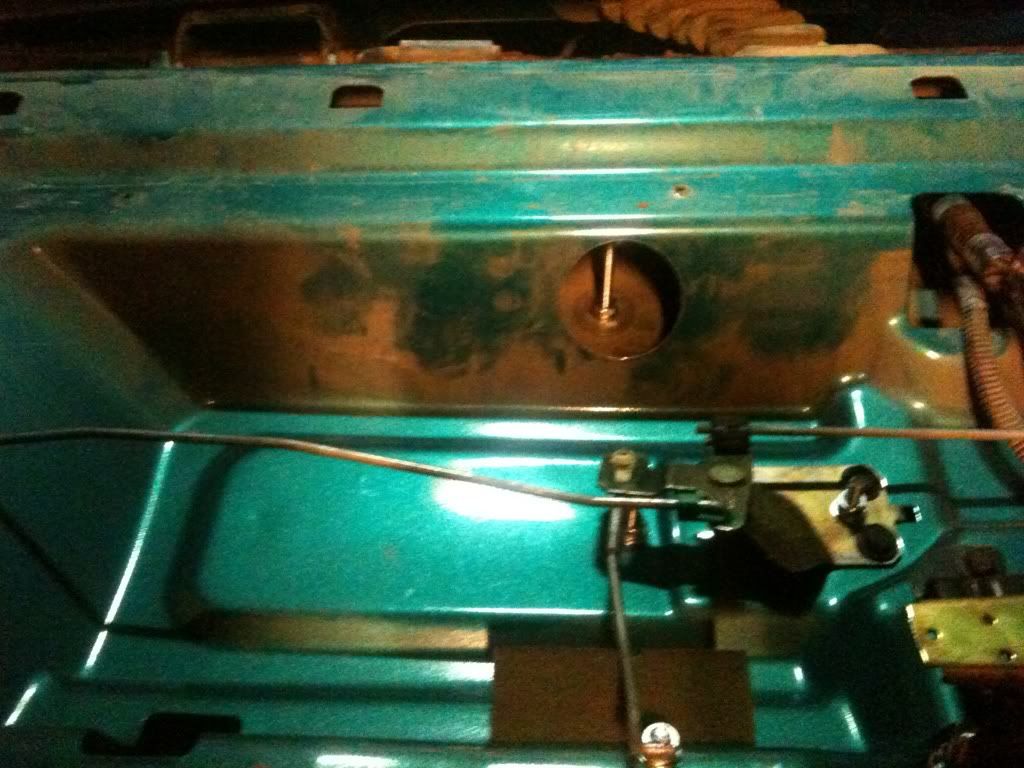
After a bit of work I got it to sit right, and got the latch plate bolted on. Here's a couple pictures of the latch plate bolts just for fun. I used 1/4" pan head bolts 2 1/2" long. Those were quite a bit too long, and I ended up cutting the ends off the top 4 bolts.
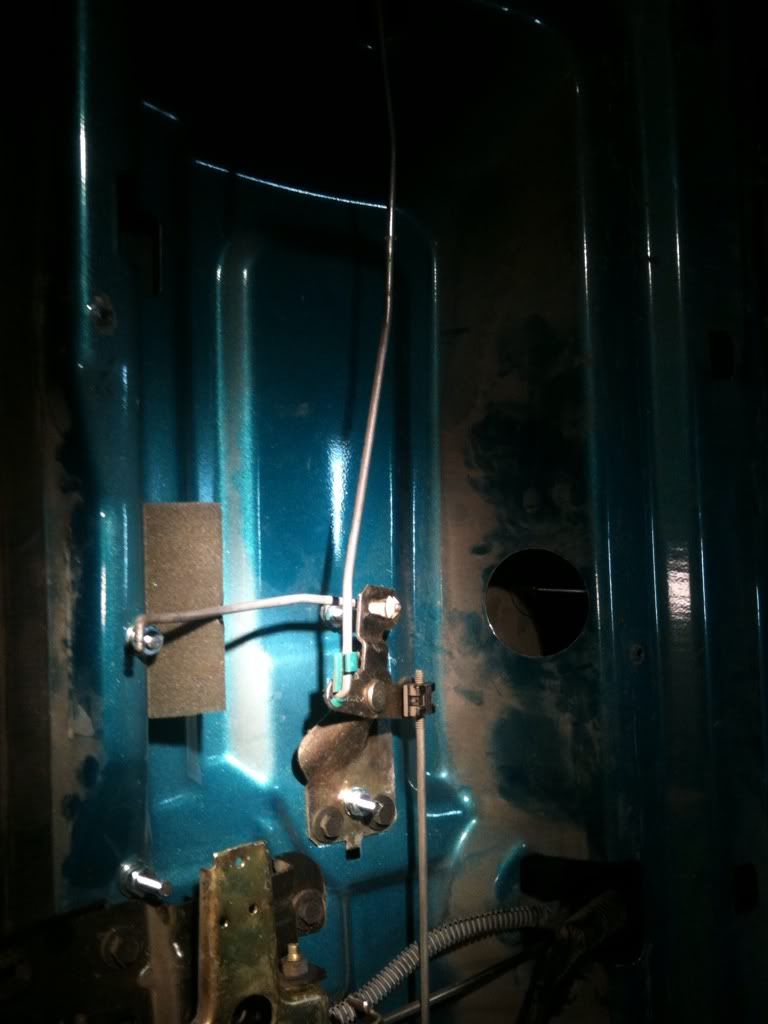
Here you can see the access hole I drilled to put the washer's and nut on the bottom bolts.
Right now all I have is my doughnut spare tire (the only one that fit under my truck because of the home made hitch). I'm hoping to get my full size spare tire here and mounted this weekend.


Like most of the people on here, I took a slightly different approach to bolting the rack on. I had a really hard time getting a drill though both panels for the upper and lower front mounting holes, so I decided to just bolt it to the skin using a shorter bolt, and a large fender washer, followed by a regular washer and a lock washer. I used a bimetal hole saw to drill an access hole to put the washer's and nut on the bolt. I didn't take a ton of pictures because I think that the how-to thread has tons already, but here's a few:
The upper front bolt:
Lower front bolt:
One of the problems I ran into was apparently the rack shifted while I was drilling the bolt holes, and I ended up with the back bolt holes about 1/8" higher than the front ones.


So I had to elongate a couple of the bolt holes about 1/8" to get it to sit right.
After a bit of work I got it to sit right, and got the latch plate bolted on. Here's a couple pictures of the latch plate bolts just for fun. I used 1/4" pan head bolts 2 1/2" long. Those were quite a bit too long, and I ended up cutting the ends off the top 4 bolts.

Here you can see the access hole I drilled to put the washer's and nut on the bottom bolts.

Right now all I have is my doughnut spare tire (the only one that fit under my truck because of the home made hitch). I'm hoping to get my full size spare tire here and mounted this weekend.


Last edited by El_Beautor; Jan 26, 2012 at 01:51 PM. Reason: Updating photo link location
Thread Starter
|
BF Veteran
Joined: Jan 2008
Posts: 2,750
From: Southern, Alberta
Let me tell you, I stood there with the drill for about half an hour before I got the courage to drill the holes. Holes are permanent, and really hard to fix. Luckily even my screwup was only minor and was really easy to fix.
I almost didn't post pictures of the truck with the donut on there. In one of the other pictures (I'll post it tonight if I can get it uploaded) my oldest son climbed up on the rear bumper while my wife and I were taking pictures and he says "Its ok Dad. I'll hide the donut" as he stands in front of the spare tire. I think I'm going to stuff it back under the truck when I get my full size spare as a double emergency backup.
I almost didn't post pictures of the truck with the donut on there. In one of the other pictures (I'll post it tonight if I can get it uploaded) my oldest son climbed up on the rear bumper while my wife and I were taking pictures and he says "Its ok Dad. I'll hide the donut" as he stands in front of the spare tire. I think I'm going to stuff it back under the truck when I get my full size spare as a double emergency backup.
Thread Starter
|
BF Veteran
Joined: Jan 2008
Posts: 2,750
From: Southern, Alberta
So, now that I've scratched a fair bit off my to-do list for the blazer, here's what's left in the immediate future:
- Diagnose if fuel pump needs replaced
- Install ZR2 torsion bars
- Hood strut install
- Undercoating
- Get muddy
- Fix rattles and creaks (Good luck?)
- Various other small things
- Diagnose if fuel pump needs replaced
- Install ZR2 torsion bars
- Hood strut install
- Undercoating
- Get muddy
- Fix rattles and creaks (Good luck?)
- Various other small things
Senior Member
Joined: Jul 2011
Posts: 658
From: Reading, PA
I think bushwacker made/makes them for the 4 doors but they're something like $400-$500 american.