
My small 96 Blazer build

Thread Starter
|
Super Moderator
Joined: Sep 2011
Posts: 4,459
From: Northern VA

That would be nice! No hurry, though, just when you get a chance. I had looked into grill/brush guards before, but there aren't any, really, for '95-'97 Everything seems to be for '98+. I really like the style of the baja challenger/eliminator. It's different from all the guys in 3/4 ton trucks with ranch hands around here.
Here are pics of the mounting points. In the first pic you can see that it is just a hole drilled in the top of the bumper and a bolt goes thru the bar and bumper and there is a nylock nut on the other side. There is also a rubber grommet inside the bar that is supplied as well.

In this pic the hex bar is welded to the bar and threaded on the inside so you drill a hole in the front of the bumper and thread a bolt into the hex bar from the inside of the bumper.

And that's it! Its incredibly simple

Thread Starter
|
Super Moderator
Joined: Sep 2011
Posts: 4,459
From: Northern VA
I pulled the stock tow hooks and then put the receiver tubes inside the frame rails to mark the holes of the tow hooks and the skid plate bolts. Then drilled out where I marked and used some grade 8 hardware to bolt the receiver tubes in.
Thread Starter
|
Super Moderator
Joined: Sep 2011
Posts: 4,459
From: Northern VA
So sorry I completely forgot to respond to you my bad!!
I pulled the fans from a 00' Dodge Intrepid at a PNP.
The on/off switch is so that if I ever want/need to turn the fans off completely say for a water crossing or something I have the ability to do so. Just a little extra control over them really.
Yeah the temp sensor is in the 3rd or 4th row of the rad near the intake hose. It just a push in type that I may one day swap out for a thread in but its working great for now so I will leave it alone
BF Veteran
Joined: Sep 2011
Posts: 2,278
From: Texas
Thanks Rex! That's what I needed to see. Is it pretty sturdy? I don't plan to push disabled vehicles out of the way, but I don't want it flopping all over the place, either.
Also, is it fairly easy to get behind the bumper to attach everything? I've already got the valance off, so it shouldn't be too bad.
Also, is it fairly easy to get behind the bumper to attach everything? I've already got the valance off, so it shouldn't be too bad.
Thread Starter
|
Super Moderator
Joined: Sep 2011
Posts: 4,459
From: Northern VA
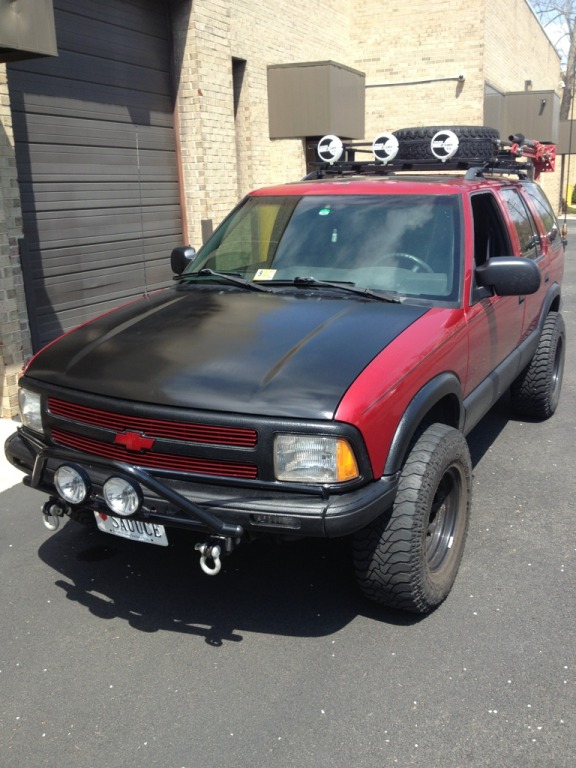
Got the jimmy hood painted and wet sanded. Still have about 4 coats of clear and more wet sanding after that but I ran out of clear. Well anyway here's some pics
2 coats of primer

I think this is coat 2 of black

6 coats of black and some wet sanding
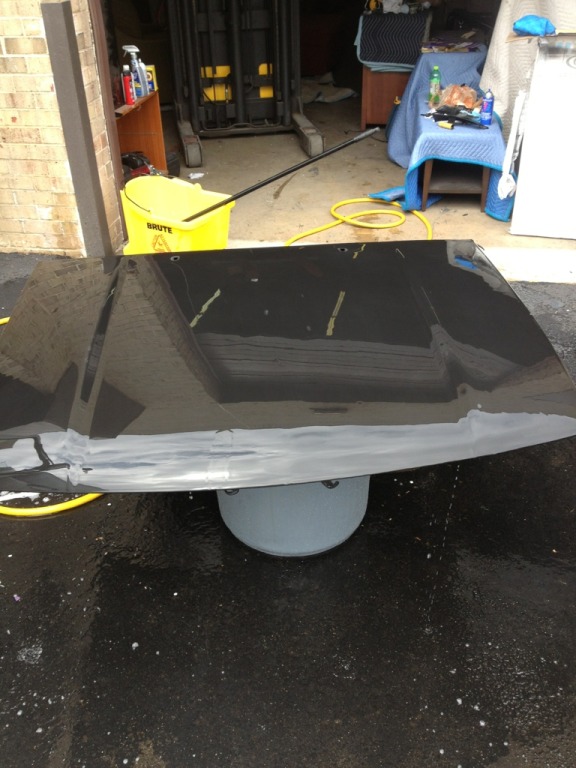
And a coat of clear on the truck

I also sanded out the fade marks on the tailghts from the POs taillight covers and recleared them
Before

After on the right
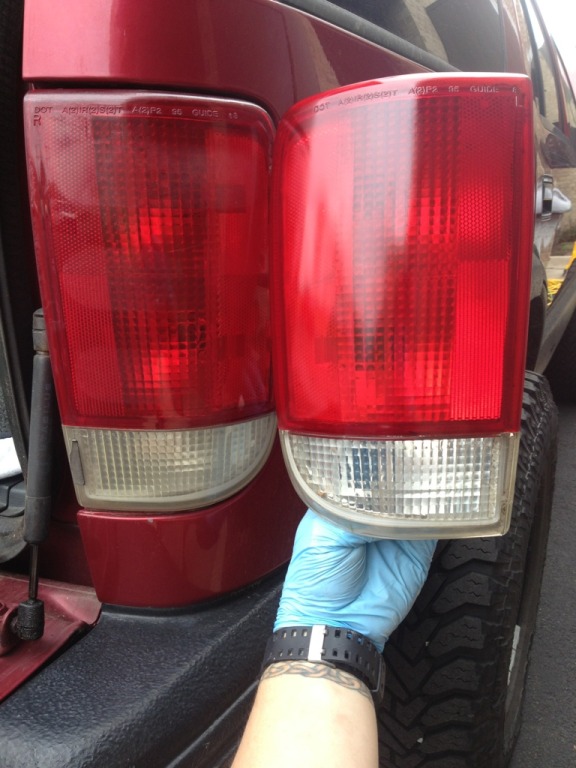
I'm happy with how they turned out. I also did the bumper blinkers and headlights a bit but no pics sorry
2 coats of primer
I think this is coat 2 of black
6 coats of black and some wet sanding
And a coat of clear on the truck
I also sanded out the fade marks on the tailghts from the POs taillight covers and recleared them
Before
After on the right
I'm happy with how they turned out. I also did the bumper blinkers and headlights a bit but no pics sorry
Thread Starter
|
Super Moderator
Joined: Sep 2011
Posts: 4,459
From: Northern VA
Thanks Rex! That's what I needed to see. Is it pretty sturdy? I don't plan to push disabled vehicles out of the way, but I don't want it flopping all over the place, either.
Also, is it fairly easy to get behind the bumper to attach everything? I've already got the valance off, so it shouldn't be too bad.
Also, is it fairly easy to get behind the bumper to attach everything? I've already got the valance off, so it shouldn't be too bad.


