
Operation Warthog

sorry, this is going to be a build thread on speed. i am playing catchup for the last couple of years.
ready set MOD!!!!!!!!!!!!!!
ok, i believe this is the point at which the mod bug bit real hard.
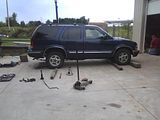
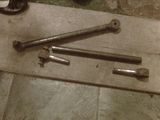
first mod, 2" shackles and t-bar crank
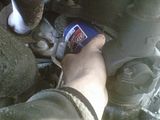
that led me to my second mod....slipped cv boots
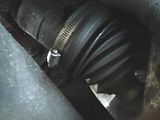
3.00 a side fix...not to shabby.
then later that year....
so far not to bad, all subtle changes.
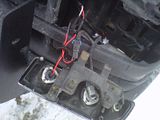
some radio mods....aux cable hard wired into aux deck.
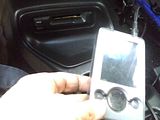
replaced all stock radio lights....ooooo...ahhhhh
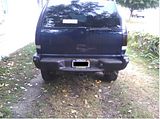
then to end the year. yup bedliner the rockers.
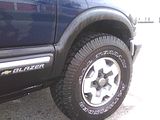
and painted up the some stock wheels that i swapped on

and some lights for the stock rack
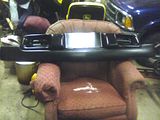
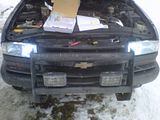
brush guard fab job
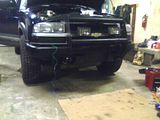
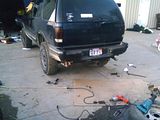
and bumper swap
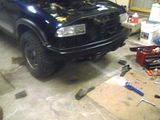
with a valance trim to tie it in
and a little touch of leather
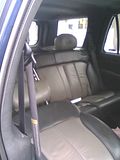
sooo much nicer than the stock seats.
and of course the overhead upgrade
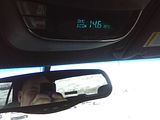
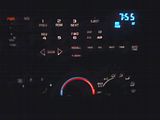
and a radio display tweak to match the overhead
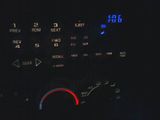
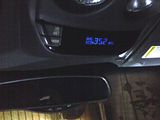
blue is much nicer...harder to read sometimes though.
and thats where the mod bug stopped me....or i thought....
ready set MOD!!!!!!!!!!!!!!
ok, i believe this is the point at which the mod bug bit real hard.

first mod, 2" shackles and t-bar crank
that led me to my second mod....slipped cv boots

3.00 a side fix...not to shabby.
then later that year....

so far not to bad, all subtle changes.
some radio mods....aux cable hard wired into aux deck.

replaced all stock radio lights....ooooo...ahhhhh

then to end the year. yup bedliner the rockers.

and painted up the some stock wheels that i swapped on

and some lights for the stock rack

brush guard fab job

and bumper swap

with a valance trim to tie it in

and a little touch of leather


sooo much nicer than the stock seats.
and of course the overhead upgrade

and a radio display tweak to match the overhead


blue is much nicer...harder to read sometimes though.
and thats where the mod bug stopped me....or i thought....
Last edited by warthogdriver; Mar 28, 2011 at 05:05 PM.
it seems the mod bug called in his buddy...the one that likes to get high...sooo here we go
seeing as how the t-crank and shackles weren't enough
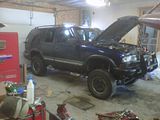
a 2" body lift...just because...
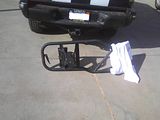
now my rusty hitch rec. is exposed!!

finishing touches
so i thought that was all.
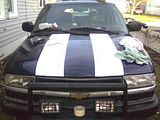
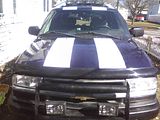
and then, yup rally stripes....why not??
its purely for speed !!!!
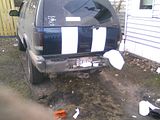
ohhhh yeah tramp stamped the rear too
and finishing touch...
didn't seem right without the top ones...
and since i was messing around on the back..lets throw this up and see what happens.
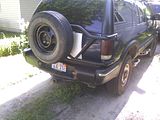
yup definitely worth drilling some holes in a perfectly good rear quarter panel
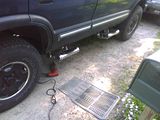
then lets toss on some steps...you know that 4" of lift can be dangerous.
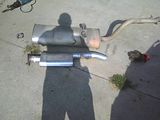
and crap...need a new exhaust...so what better time for a cherry turbo and a dump
now i have these painted up and ready for tires....16x8 z's for the win.
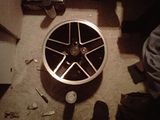
budget will be holding that back awhile...
in the mean time lets balance out the wheels since i noticed how far they set in in the back
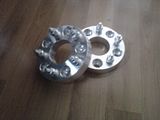
1.5" wheel adapters should fix that

that will do the trick

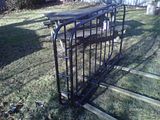
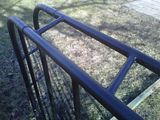
rack that i built...waiting for the warm weather to get here to fab up brackets..
a little slant...so i look fast sitting still
and some hid's to brighten up the night
just the highs for now.....
and just when i thought i couldn't get any higher....the tax man to the rescue...what you have a better way to blow your refund??
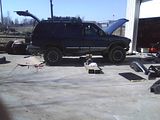
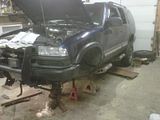
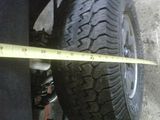
5" bds lift going on.
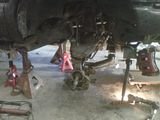
rear just about done.
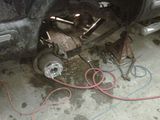
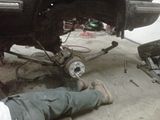
front tore down to frame
front going back on
ohhh sooo nice
front in
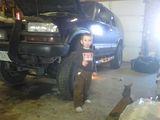
just for scale
front wheel well looking good
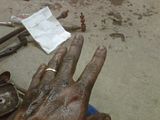
the hands get beat up pretty bad.
seeing as how the t-crank and shackles weren't enough

a 2" body lift...just because...

now my rusty hitch rec. is exposed!!

finishing touches
so i thought that was all.
and then, yup rally stripes....why not??
its purely for speed !!!!


ohhhh yeah tramp stamped the rear too
and finishing touch...

didn't seem right without the top ones...
and since i was messing around on the back..lets throw this up and see what happens.


yup definitely worth drilling some holes in a perfectly good rear quarter panel
then lets toss on some steps...you know that 4" of lift can be dangerous.

and crap...need a new exhaust...so what better time for a cherry turbo and a dump

now i have these painted up and ready for tires....16x8 z's for the win.

budget will be holding that back awhile...
in the mean time lets balance out the wheels since i noticed how far they set in in the back

1.5" wheel adapters should fix that

that will do the trick

rack that i built...waiting for the warm weather to get here to fab up brackets..


a little slant...so i look fast sitting still
and some hid's to brighten up the night


just the highs for now.....
and just when i thought i couldn't get any higher....the tax man to the rescue...what you have a better way to blow your refund??

5" bds lift going on.


rear just about done.
front tore down to frame

front going back on

ohhh sooo nice

front in

just for scale

front wheel well looking good


the hands get beat up pretty bad.
picked up a westin bar this winter...ditched the fabbed one

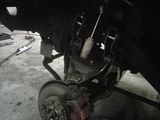
rear stabilizer had to be extended because of
suspension lift.
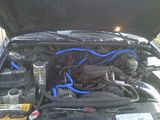
and now that i shelled out all the cash for the susp lift i can finally mount the oil filter on the block...man what i wouldnt do to ditch those leaking cooler lines.
and that brings me to march 2011.
and back to cosmetics
ongoing project here.
and now the rear end is complete
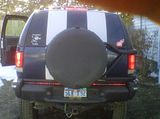
the stripes just had to wrap all the way around...and the lightbar is nice too
i know this all reads like a laundry list...i should have done this long ago.
almost everything i did had a write up or there is one on the forum here for it.
pheewwww.....ok so from here forward i will keep this up to date.
feel free to ask questions and leave comments
thanks to the forum and the mod bug for helping me rid myself of leftover cash.

rear stabilizer had to be extended because of
suspension lift.

and now that i shelled out all the cash for the susp lift i can finally mount the oil filter on the block...man what i wouldnt do to ditch those leaking cooler lines.

and that brings me to march 2011.
and back to cosmetics

ongoing project here.
and now the rear end is complete

the stripes just had to wrap all the way around...and the lightbar is nice too
i know this all reads like a laundry list...i should have done this long ago.
almost everything i did had a write up or there is one on the forum here for it.
pheewwww.....ok so from here forward i will keep this up to date.
feel free to ask questions and leave comments
thanks to the forum and the mod bug for helping me rid myself of leftover cash.
Last edited by warthogdriver; Mar 28, 2011 at 05:21 PM.
this is how i did it...part was from local yard
https://blazerforum.com/forum/lighti...ir-trip-41368/
hope that helps ya out.
https://blazerforum.com/forum/lighti...ir-trip-41368/
hope that helps ya out.
https://blazerforum.com/forum/audio-...-inputs-35746/
write up i did ....any questions let me know.
i have to say having the creator of one of favorite build threads to follow visiting mine is nice.
i think of your ride as a blazer on steroids...I LIKE IT.
Junior Member
Joined: Jun 2010
Posts: 414
From: Germany

yes no problem at all....
https://blazerforum.com/forum/audio-...-inputs-35746/
write up i did ....any questions let me know.
i have to say having the creator of one of favorite build threads to follow visiting mine is nice.
i think of your ride as a blazer on steroids...I LIKE IT.
https://blazerforum.com/forum/audio-...-inputs-35746/
write up i did ....any questions let me know.
i have to say having the creator of one of favorite build threads to follow visiting mine is nice.
i think of your ride as a blazer on steroids...I LIKE IT.
I think i`ll do that mod tomorrow, seems much better than my fm transmitter...
i think it sounds better...better even then cassette adapter.
i never went further with this but i am sure there would be a way to trick the aux deck into thinking there was a tape in the unit.
if so the unit could be possibly moved behind dash and condensed.
just a thought.
i know when i disconnect battery the cassette adapter has to be put back in...not a big deal but it would be a nice way to finish this mod.