
what have you gotten done on your blazer today?


First off, thanks to all who contributed info and such to my project. I'm happy to report that the job is 90% done. There is apparently a leak where the y pipe meets the header due to a missing hat bolt there. Will correct later this week. Also I was a dummy and forgot to order the intermediate pipe to install my new Thrush Welded muffler. Will get to that before the weekend. Can't wait to hear how it sounds.
I scoured this forum as well as you tube and the rest of the internet only to discover there was very little information concerning how to remove the exhaust on our Blazers.
I pretty much winged it and cane across the following issues:
1. You have to cut the exhaust about 2 inches past the cat in order to remove it completely because you are restricted from bringing the entire assembly back far enough by the frame cross member (not the one for the trans, it's removable).
2. You will need a bottle jack and some blocks to raise the trans up high enough to completely remove that cross member due to the bolt in the center of it.
3. The y-pipe-to-header nuts can be easily accessed and removed if you a) first spray them down with pb blaster and let them soak.
b) use a ratchet with a long extendable handle and an assortment of extensions from 4 inch to 16 inch lengths. And don't lose track of these nuts. They don't sell them at the store.
Thanks again and good night.
I agree that if you can repost it with pictures as a 'How To' it could be helpful to someone in the future. Sometimes we tend to take for granted that we've figured out some little trick that someone else, possibly someone who has never worked on vehicles before, won't know or think of.
I know we fought with the Y-pipe on my son's Blazer. Our main fight was those spring loaded bolts. I never got them installed the first time around and had to take it to a muffler shop. They in turn told me They couldn't start one of them and had to swap out that spring for a slightly shorter one.
The designers that decided exactly where those exhaust parts would end, making it so you have to work three times as hard as needed to remove them, would be great for putting in the gladiator ring. I'd pay to watch them fight it out. We're civilized now days so it doesn't Have to be to the death.
Senior Member
Joined: Oct 2016
Posts: 605
From: Thomson, Ga.

You might re-post your exhaust removal instructions with pictures (if you have them), appropriate key-words, and title as a more extensive post so that the next person who needs this advice can easily find it. I only suggest this as I've been so appreciative of those who did that and by doing so saved me many headaches by not having to "reinvent the wheel." 
Nice job and congrats on making so much progress!
Christine
Nice job and congrats on making so much progress!
Christine
When I have time, I'm gonna do a write up on some other things I haven't seen on here that I need to do to mine. Thanks for the recognition though.
BF Guru
Joined: Dec 2016
Posts: 5,610
From: Moscow, ID
Tried to track down what I suspected was a vacuum leak for my Auto-HVAC system. The symptom was that going up a long grade (1700' in 6 miles) the air selector would switch from defrost to dash vents.
Checked the vacuum supply for my Auto-HVAC system using my Mityvac (I just love this tool!) and discovered that I had had a leak at where the HVAC vacuum line connects to the vacuum supply circuit. The leak was due to a loose fit of the flexible female end to the Tee. I use a zip-tie as a clamp and it seems to have sealed it up.
I won't know for certain if it is fixed until I take it for another drive in similar situations.
I also diagnosed what I thought was a whistle from my heater box that turned out to be the blower motor bearing going.
Any thoughts on blower motor brands to avoid?
Super Member
Joined: Apr 2014
Posts: 1,968
From: Lake City, Florida
Took the 50" light bar off and opened it up to dry up the condensation inside... sorry cheap China made light bar... 46 screws across the front of that stupid thing... She's lathered up with silicone on both ends now. If it leaks again, screw it, it leaks lol
Also replaced my front airbag impact sensors yesterday to try and get rid of an airbag light. Still on, not sure if the system needs to be reset first, but a buddy of mine has a Snap-On scanner that I'm going to try and reset it tomorrow and see what happens. In the process of replacing them I made it super easy to replace them again since I used junk-yard sensors :P Drilled the rivets and installed some threaded rivets, so now the sensor just bolts on with some stainless hardware instead of being riveted on! If you've ever had to replace these, you how hard these rivets are to drill out!
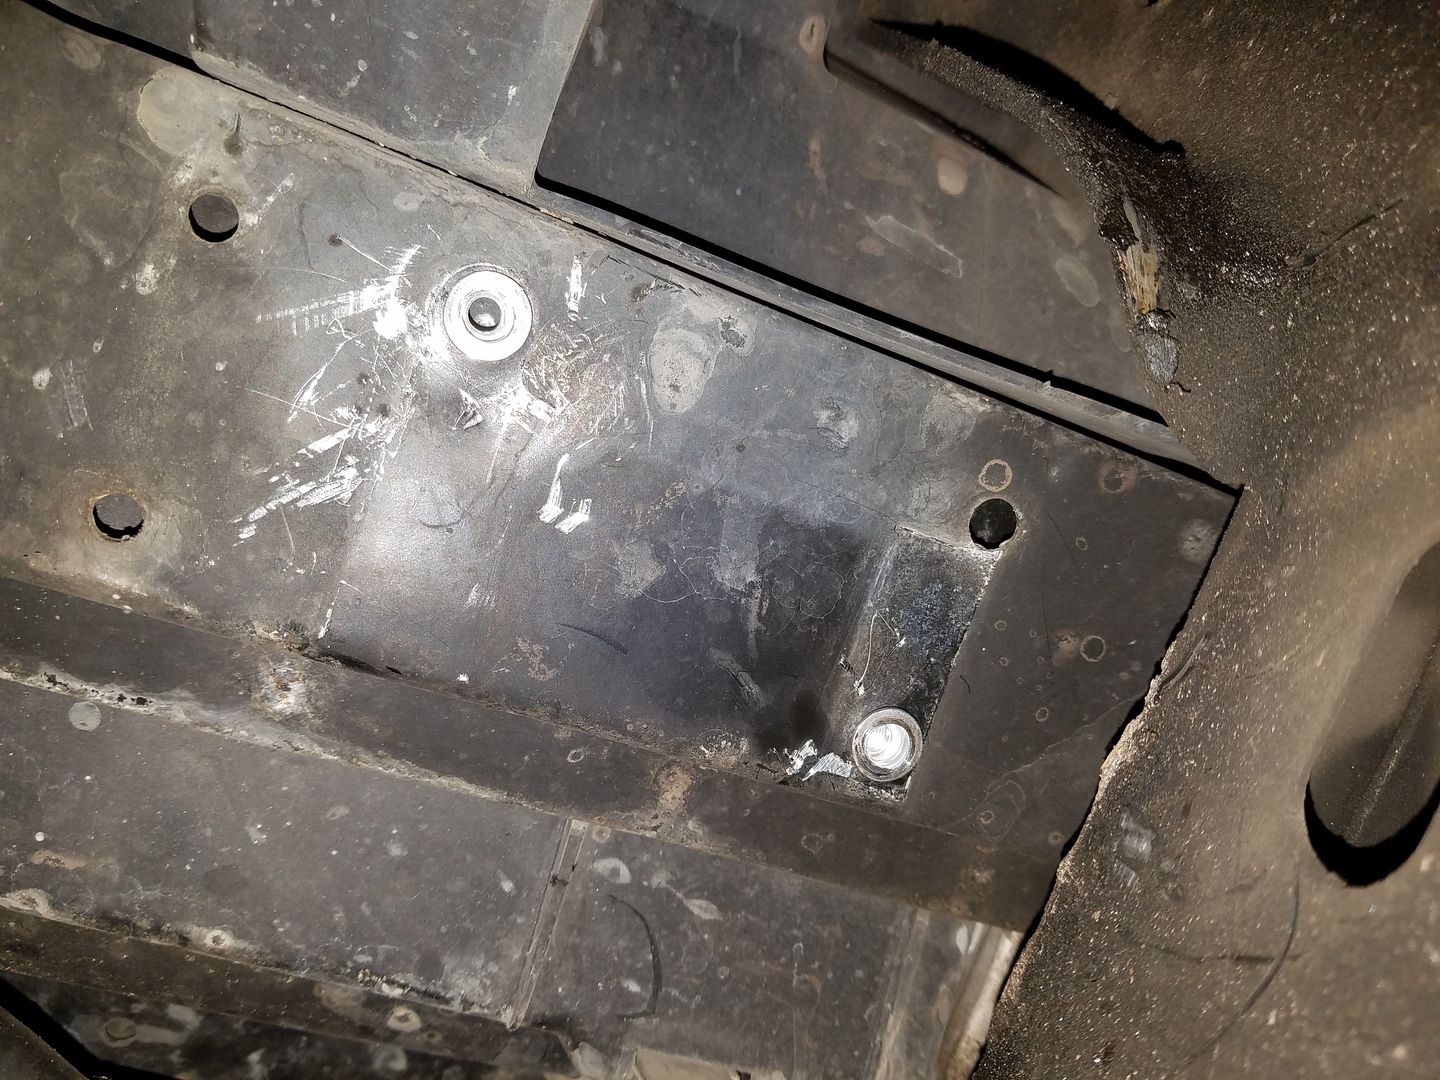
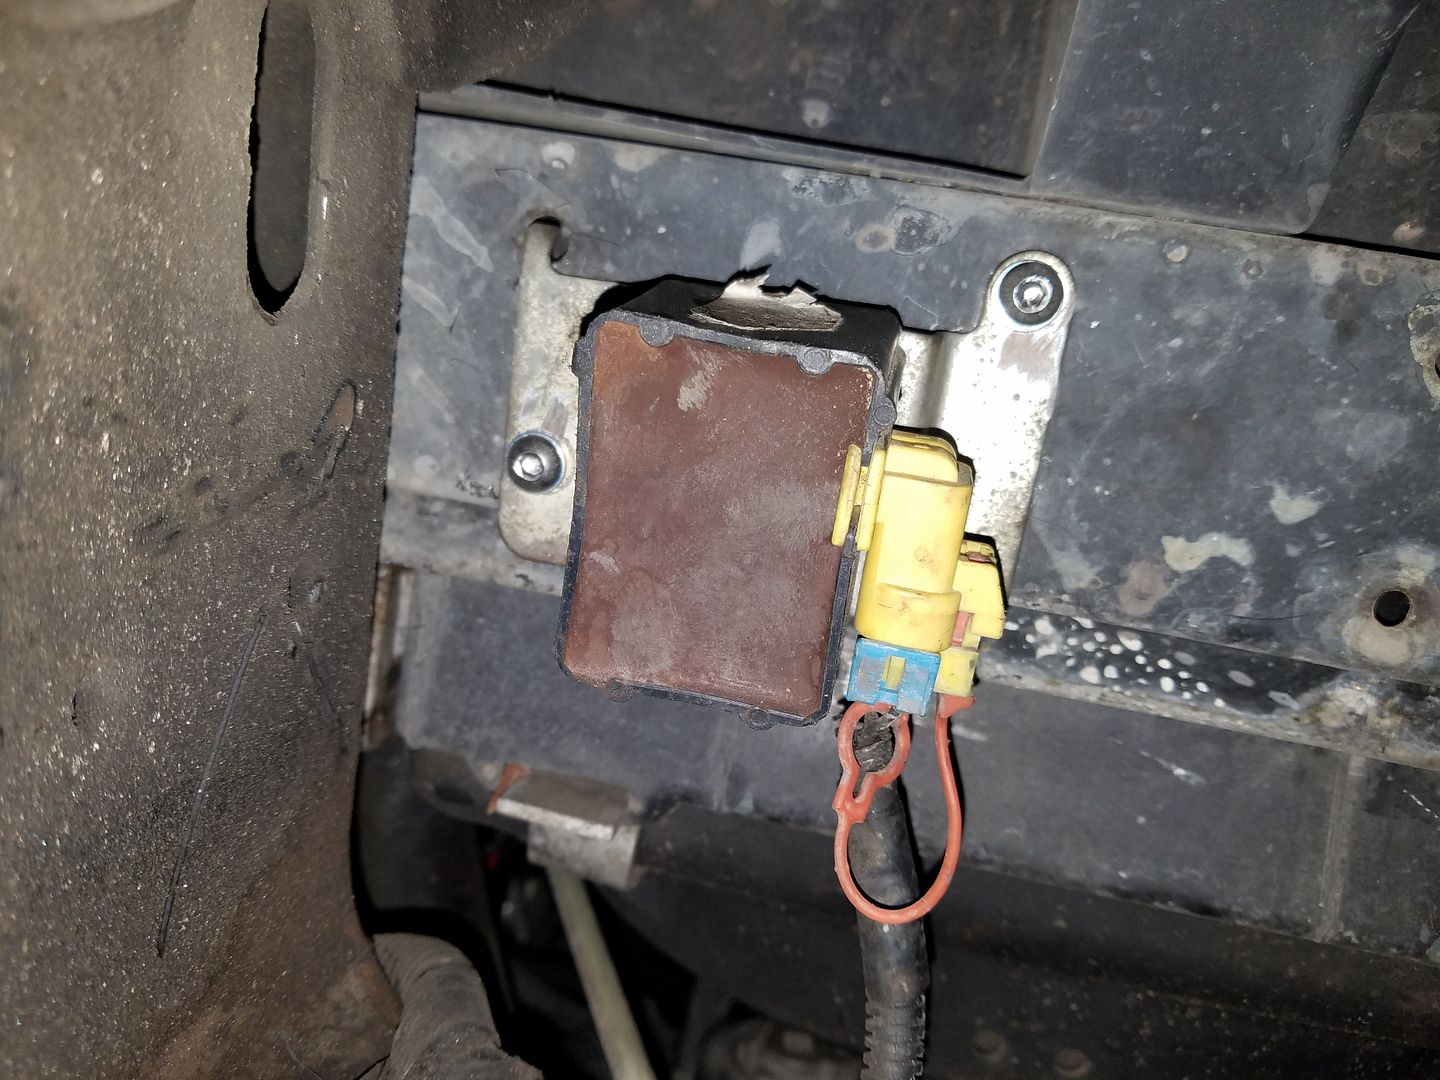
Also replaced my front airbag impact sensors yesterday to try and get rid of an airbag light. Still on, not sure if the system needs to be reset first, but a buddy of mine has a Snap-On scanner that I'm going to try and reset it tomorrow and see what happens. In the process of replacing them I made it super easy to replace them again since I used junk-yard sensors :P Drilled the rivets and installed some threaded rivets, so now the sensor just bolts on with some stainless hardware instead of being riveted on! If you've ever had to replace these, you how hard these rivets are to drill out!
BF Guru
Joined: Dec 2016
Posts: 5,610
From: Moscow, ID
...
Also replaced my front airbag impact sensors yesterday to try and get rid of an airbag light. Still on, not sure if the system needs to be reset first, but a buddy of mine has a Snap-On scanner that I'm going to try and reset it tomorrow and see what happens. In the process of replacing them I made it super easy to replace them again since I used junk-yard sensors :P Drilled the rivets and installed some threaded rivets, so now the sensor just bolts on with some stainless hardware instead of being riveted on! If you've ever had to replace these, you how hard these rivets are to drill out!
Also replaced my front airbag impact sensors yesterday to try and get rid of an airbag light. Still on, not sure if the system needs to be reset first, but a buddy of mine has a Snap-On scanner that I'm going to try and reset it tomorrow and see what happens. In the process of replacing them I made it super easy to replace them again since I used junk-yard sensors :P Drilled the rivets and installed some threaded rivets, so now the sensor just bolts on with some stainless hardware instead of being riveted on! If you've ever had to replace these, you how hard these rivets are to drill out!
I tried unplugging and then reconnecting the plugs for the two under bumper ones. I drove it about 60 miles and I think the light was not on as much as it was before but I can't be sure. Apparently there is one under the console that can benefit from the same unplugging and reconnecting.

Beginning Member
Joined: Jun 2017
Posts: 11
From: Mechanicsville, VA

At 6:25 PM east coast today, I turned the key on 3 times to fill the fuel line, with the coil wire off, turned the engine over 3 times to get some parts oiled, attached the coil wire back on, turned the key and KAPLAH ~ SUCCESS ~ HOOTY HOOT, HOOTY HOOT, she started right up. The only time I had any doubts was before the engine started. I took the engine out, changed head gaskets, timing chain & other things then made it look 'PURDY" and put in back in by myself. 1st out of the car engine overhaul. Let you know later if there are any issues.
SHE STARTED!!!!!<br/>
Last edited by Poppy53; Nov 6, 2017 at 09:18 PM. Reason: Add pic, grammer
BF Guru
Joined: Dec 2016
Posts: 5,610
From: Moscow, ID
[
At 6:25 PM east coast today, I turned the key on 3 times to fill the fuel line, with the coil wire off, turned the engine over 3 times to get some parts oiled, attached the coil wire back on, turned the key and KAPLAH ~ SUCCESS ~ HOOTY HOOT, HOOTY HOOT, she started right up. The only time I had any doubts was before the engine started. I took the engine out, changed head gaskets, timing chain & other things then made it look 'PURDY" and put in back in by myself. 1st out of the car engine overhaul. Let you know later if there are any issues.
SHE STARTED!!!!!<br/>
Senior Member
Joined: Oct 2016
Posts: 605
From: Thomson, Ga.
At 6:25 PM east coast today, I turned the key on 3 times to fill the fuel line, with the coil wire off, turned the engine over 3 times to get some parts oiled, attached the coil wire back on, turned the key and KAPLAH ~ SUCCESS ~ HOOTY HOOT, HOOTY HOOT, she started right up. The only time I had any doubts was before the engine started. I took the engine out, changed head gaskets, timing chain & other things then made it look 'PURDY" and put in back in by myself. 1st out of the car engine overhaul. Let you know later if there are any issues.
SHE STARTED!!!!!<br/>
Super Member
Joined: Apr 2014
Posts: 1,968
From: Lake City, Florida
Keep us posted on the airbag sensor repair. I'd like to know how to track down the origin of my intermittent warning light.
I tried unplugging and then reconnecting the plugs for the two under bumper ones. I drove it about 60 miles and I think the light was not on as much as it was before but I can't be sure. Apparently there is one under the console that can benefit from the same unplugging and reconnecting.
I tried unplugging and then reconnecting the plugs for the two under bumper ones. I drove it about 60 miles and I think the light was not on as much as it was before but I can't be sure. Apparently there is one under the console that can benefit from the same unplugging and reconnecting.
Well using my buddy's scanner it was pointing towards the circuit the front sensors are on, so we'll see how it goes :P