LOG IN
REGISTER
Forums
Announcements
Forum Notice
New Member Area
General
General Chat
The Lounge
Builds
Off Roading
Sights N Sounds
Street N Strip
The Chop Shop
Shows & Clubs
Mechanical & Maintenance
General Tech Help
Engine & Transmission
Lighting & Electrical
Steering, Suspension & Drivetrain
Modifications
Performance & Brainstorming
Tires and Wheels
Audio/Video Electronics
Paint, Body, & Interior
Suspension Tech
Detailing
Chevy Blazer Classifieds
Member Group And Special Buys
Absolutely Free!!!
PRIVATE For Sale / Trade Classifieds
Private 'Wanted' Classifieds
Online Auctions & Listings
The Site
Website Problems and Suggestions
Marketplace
Vendor Directory
Become a Vendor
New Posts
Tools
Car Payment Calculator
Tire Rim Calculator
Recalls
Technical Service Bulletins (TSBs)
Members List
Live Feed
Gallery
View Dark Mode
Please register or login to enable Dark Mode.
Log In
Register
Threads
Google
Threads
Posts
Advanced
Dark Mode
Please register or login to enable Dark Mode.
Log In
Forgot your Password?
By logging into your account, you agree to our
Terms of Use
and
Privacy Policy
, and to the use of cookies as described therein.
Recent
Commented
Albums
My Pictures
My Post Pictures
christine_208
October 15, 2017
759
3
Sort:
Default
Default
Most Recent
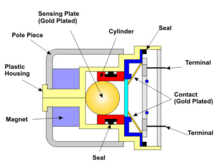
Looking down into the sensor. Forward is to the top of the picture.
0
2018/08/12 18:40:00
christine_
Note where the electrical leads from the plug receptacles come in the body and then attach to the PCB.
0
2018/08/12 18:40:13
christine_
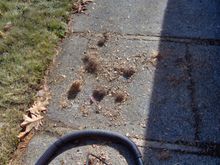
Organically grown, free-range, locally sourced fajita meat! :)
0
2018/08/12 19:10:33
christine_
0
2018/08/13 09:29:12
christine_
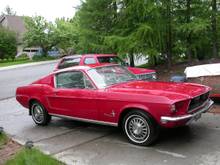
One family Mustang. :)
0
2018/08/15 11:23:19
christine_
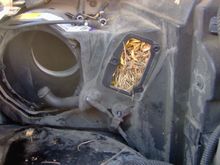
I have the Auto Climate Control and with the temperature control module out, I was able to get to the leaves and needles.
0
2018/08/16 12:34:51
christine_
Some of the needles I took out.
0
2018/08/16 12:35:21
christine_
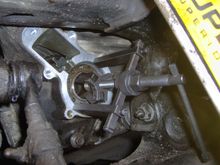
testing my parking brake
0
2018/08/21 12:55:30
christine_
0
2018/09/07 10:33:07
christine_
Drive axle partially removed before I realized I would have to also remove the steering knuckle to get it out.
0
2018/09/23 20:33:22
christine_
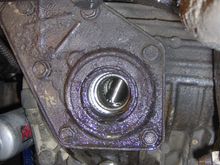
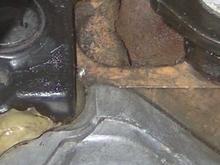
Close up of left side of differential with axle removed looking into the differential
0
2018/09/23 20:34:42
christine_
Inner face of bearing showing rounded face.
0
2018/09/23 20:46:22
christine_
Outer face of bearing showing stamped lettering. This must be installed with this face facing outward.
0
2018/09/23 20:46:29
christine_
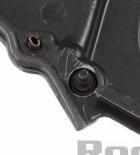
Inside face of new cover.
0
2018/09/23 20:48:29
christine_
Outside face of new cover.
0
2018/09/23 20:49:58
christine_
Bearing removal tool before modification.
0
2018/09/23 20:52:21
christine_
Bearing removal tool mounted in place and pulling commenced.
0
2018/09/23 20:52:32
christine_
Modified jaws of bearing puller showing that in addition to shortening them, I should have filed down the parts that extended outward.
0
2018/09/23 20:52:45
christine_
New bearing installed. I pre-oiled it as a precaution.
0
2018/09/23 20:57:13
christine_
Bearing insertion tool. When it was close to being fully in, I took one of the larger anvil heads and mounted it so only the flat face was outward so that for the final taps of the hammer I would not over insert it.
0
2018/09/23 20:57:31
christine_
New cover installed. I used the Permatex flange sealant. The original did not have any sealant but this sealant was called for in the GM manual in the steps for rebuilding the front differential and axle.
0
2018/09/23 20:57:54
christine_
after cleaning
0
2018/09/25 13:33:15
christine_
after running for about 10 minutes
0
2018/09/25 13:33:38
christine_
backside of new part
0
2018/09/25 13:34:12
christine_
Front of the vehicle is to the left and the left fender is at the bottom.
0
2018/10/02 22:12:03
christine_
0
2018/10/02 22:21:36
christine_
0
2018/10/04 08:53:34
christine_
0
2018/10/05 17:16:27
christine_
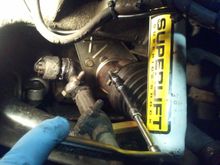
Initial installation
0
2018/10/13 19:32:56
christine_
Tightening with tensioning bit
0
2018/10/13 19:33:13
christine_
Tensioned, next step, shorten extra strap and secure
0
2018/10/13 19:33:29
christine_
Tail end of strap bent back and secured with tabs
0
2018/10/13 19:33:42
christine_
One of the smaller bands and the tensioning bit.
0
2018/10/13 19:33:55
christine_
This view is looking towards the rear, drivers side corner of the engine compartment.
0
2018/10/23 19:07:14
christine_
From Dec. 2010.
0
2018/10/23 19:22:29
christine_
0
2018/10/25 09:40:58
christine_
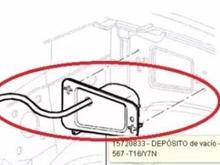
Auto-climate control HVAC vacuum schematic. The manual climate control is similar in its routing.
0
2018/11/02 15:55:38
christine_
0
2018/11/08 21:36:53
christine_
0
2018/11/08 21:36:57
christine_
0
2018/11/08 21:41:55
christine_
First
Page
4 of 19
Last
Go To
Page
1
2
3
4
5
6
7
...
19
4 of 19
Go To
GO
Go to page
of 19
pages
1
2
3
4
5
6
7
...
19