My bike 'Jenna'
#211
 09-02-2013, 03:31 AM


Love the brake light, just wondering if I could do that on my Harley and what's involved.
#212
09-02-2013, 10:04 AM
Seee if I can explain it the best I can,For one my engine runs off battery power so the altenator is continuesly charging making voltage.This voltage gets sent to rectifier/regulator which converts the current into a continues stream of 12 volts to the engine and the lights.
On your bike since its much newer than mine I dont beleive your engine needs the battery to run.It has a self sustaining charging system from the stator and generator.In order to run led`s you have to split the voltage by adding capacitors and diodes so that the leds arent requiring a continous 12 volts and decrease the voltage in order for them to work.I know theres more to this but the elctronics are not my strong point on these bikes.
On your bike since its much newer than mine I dont beleive your engine needs the battery to run.It has a self sustaining charging system from the stator and generator.In order to run led`s you have to split the voltage by adding capacitors and diodes so that the leds arent requiring a continous 12 volts and decrease the voltage in order for them to work.I know theres more to this but the elctronics are not my strong point on these bikes.
#213
09-02-2013, 12:48 PM
First you would need a board to attach all of the leds and components to. Something like these would work fine, just make sure the one you get is big enough to fill the light housing you are using.
Next you would need to know what kind of led you will be using. I highly suggest you use the HPWT leds from Phillips that I used, which can be found on ebay, but do not be fooled, there is a lot of chinese crap out there.
After that you'd need to open up the tail light housing to get the board in there, which can be difficult, so I'd recommend buying a new one and working on it instead of the stock one just in case you break it or mess it up somehow.
Then you'd trim the board to the inside of the housing so it fits snug.
Once that's all done you'd need to decide how you want to arrange the leds on the board. Definitely make sure you leave at least one little hole in between the leds to make soldering them easier.
Solder them all in place and wire them up and you are good to go.
If you do decide to do it, make sure to post a new thread (probably in the lighting and electrical section) and richphotos and I can help you with any questions you may have on wiring or any part of the process really.
Seee if I can explain it the best I can,For one my engine runs off battery power so the altenator is continuesly charging making voltage.This voltage gets sent to rectifier/regulator which converts the current into a continues stream of 12 volts to the engine and the lights.
On your bike since its much newer than mine I dont beleive your engine needs the battery to run.It has a self sustaining charging system from the stator and generator.In order to run led`s you have to split the voltage by adding capacitors and diodes so that the leds arent requiring a continous 12 volts and decrease the voltage in order for them to work.I know theres more to this but the elctronics are not my strong point on these bikes.
On your bike since its much newer than mine I dont beleive your engine needs the battery to run.It has a self sustaining charging system from the stator and generator.In order to run led`s you have to split the voltage by adding capacitors and diodes so that the leds arent requiring a continous 12 volts and decrease the voltage in order for them to work.I know theres more to this but the elctronics are not my strong point on these bikes.
#214
09-02-2013, 12:54 PM
[QUOTE=Thogert;599226]It's not too difficult of a process if you have a basic grasp on simple circuits and soldering.
First you would need a board to attach all of the leds and components to. Something like these would work fine, just make sure the one you get is big enough to fill the light housing you are using.
Next you would need to know what kind of led you will be using. I highly suggest you use the HPWT leds from Phillips that I used, which can be found on ebay, but do not be fooled, there is a lot of chinese crap out there.
After that you'd need to open up the tail light housing to get the board in there, which can be difficult, so I'd recommend buying a new one and working on it instead of the stock one just in case you break it or mess it up somehow.
Then you'd trim the board to the inside of the housing so it fits snug.
Once that's all done you'd need to decide how you want to arrange the leds on the board. Definitely make sure you leave at least one little hole in between the leds to make soldering them easier.
Solder them all in place and wire them up and you are good to go.
If you do decide to do it, make sure to post a new thread (probably in the lighting and electrical section) and richphotos and I can help you with any questions you may have on wiring or any part of the process really. QUOTE]
Thank you very much for the info.
Thankfully I have a spare rear light that I got on eBay but with everything never got around to fitting it, so it looks like I'm going eBay hunting again tonight for the parts.
#215
09-03-2013, 01:34 AM
Well my camera sucks big hairy monkey ****, but here's a vid of the turn signal tied into the brake lights. IRL you can see that it's only half flashing. The way I have it wired, the brake light overrides the flashing of the turn signal portion so as to make sure people know I'm stopping.
20130902_232742_zps36980bce.mp4 Video by thogert | Photobucket
20130902_232742_zps36980bce.mp4 Video by thogert | Photobucket
#216
09-03-2013, 08:15 AM
That light should do the trick,I would like to have a front head lamp that does that along with the rear.
Also yesterday I removed my rear sprocket since its totaly worn.Im also going to upgrade the teeth from 37 to 38.Then decrease the tooth count on the front from 17 to 15.This should knock off a big chunk of high rpms at cruising speed.
Also yesterday I removed my rear sprocket since its totaly worn.Im also going to upgrade the teeth from 37 to 38.Then decrease the tooth count on the front from 17 to 15.This should knock off a big chunk of high rpms at cruising speed.
Last edited by 1sttimejimmyowner; 09-03-2013 at 08:18 AM.
#217
09-03-2013, 11:39 PM
Be careful you don't take away too much bottom end power.
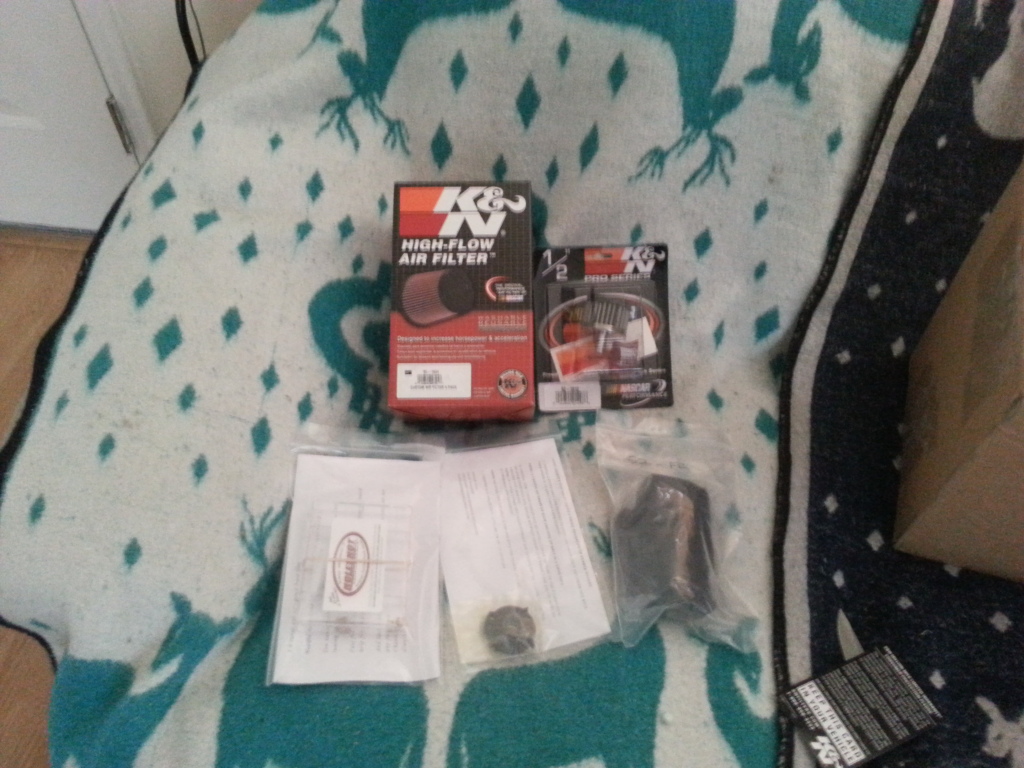
Well I ordered the jet kit today with the K&N pod filters and a water repellent filter cover for when I get caught in the rain.
Should look something like this.
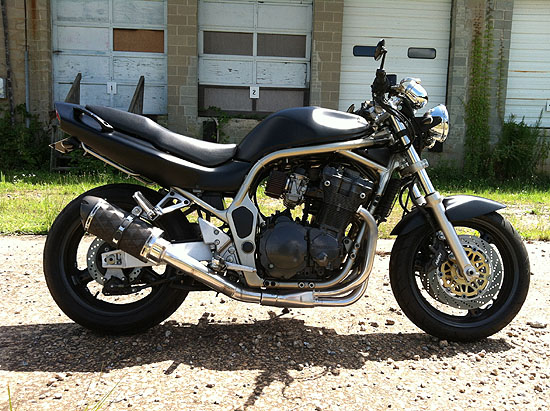
Well I ordered the jet kit today with the K&N pod filters and a water repellent filter cover for when I get caught in the rain.
Should look something like this.
#218
09-04-2013, 11:04 AM
Yeah I had the teeth count for my ratios that I was wanting.So what I`ll be doing is decreasing teeth count on the rear by 1 and increase the teeth count by 2 on the front.Theres a thread about it on XS400.com
#219
09-04-2013, 11:08 AM
I was about to comment on your first post about going down in the front and up in the rear but you corrected it with this post lol. More teeth in the back and less up front means lower gear which of course you know means higher rpms.
#220
09-09-2013, 10:31 PM
Sooo, I got this in.
Which led to this:
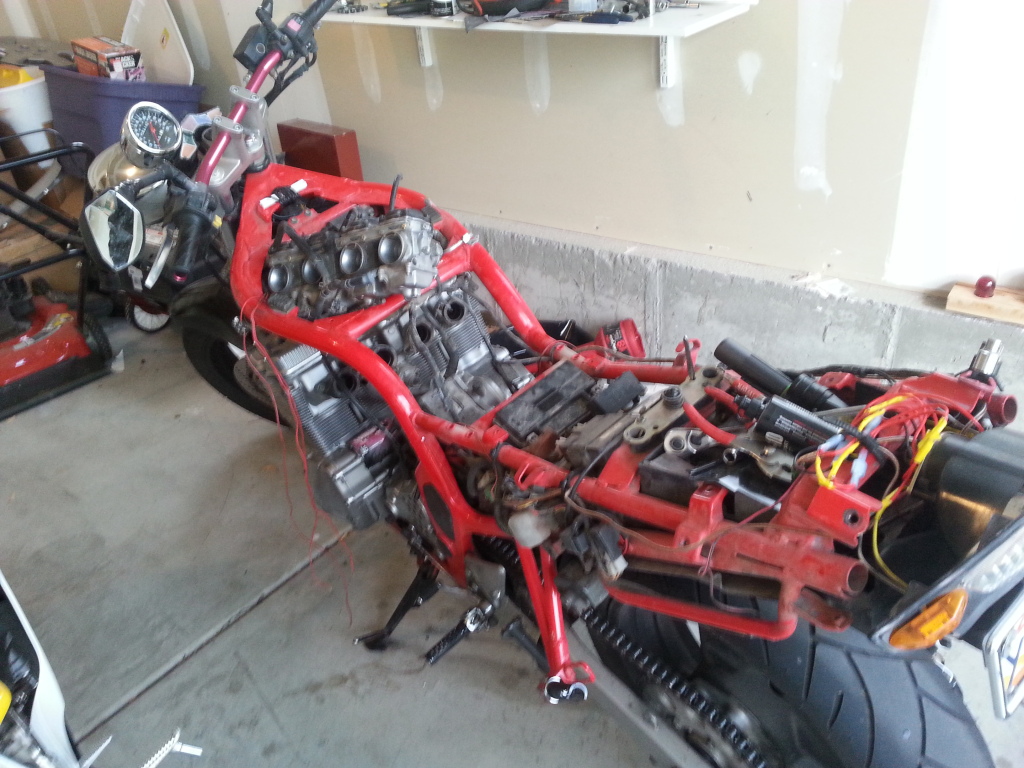
I got it together and took it for a spin and I must say the thing sounds awesome. It is running a little rich at the moment, so I need to remove one of the needle shims due to living at over 3000ft, but overall, $ well spent.
I'll get a pic of how the filters look tomorrow, and maybe a short vid if my phone will do it any justice.
Which led to this:
I got it together and took it for a spin and I must say the thing sounds awesome. It is running a little rich at the moment, so I need to remove one of the needle shims due to living at over 3000ft, but overall, $ well spent.
I'll get a pic of how the filters look tomorrow, and maybe a short vid if my phone will do it any justice.
Last edited by Thogert; 09-09-2013 at 10:35 PM.