When you click on links to various merchants on this site and make a purchase, this can result in this site earning a commission. Affiliate programs and affiliations include, but are not limited to, the eBay Partner Network.
General ChatChat about all things Blazer (and related vehicles). Off-topic stuff should be in the lounge, and all mechanical problems should be posted in the proper forum.
then cut three of them down so they would fit on top of one another. Then I made a template out of cardboard, traced it onto some spare 1/8" ABS plastic sheet and used J-B Weld Plastic Bonder to glue the pieces together and used a heat gun for help with shaping the back curve. Then more epoxy to fill in the gaps, sanded it so it would blend somewhat. Some Dremel work and then a couple coats of temporary paint. A real pain but it was worth it for having light switched in the same area and not all over the place.
I'll take more pics of it when I smooth it out and paint it properly to match the interior better.
Last edited by BlazerDog97S10; 09-02-2023 at 08:14 PM.
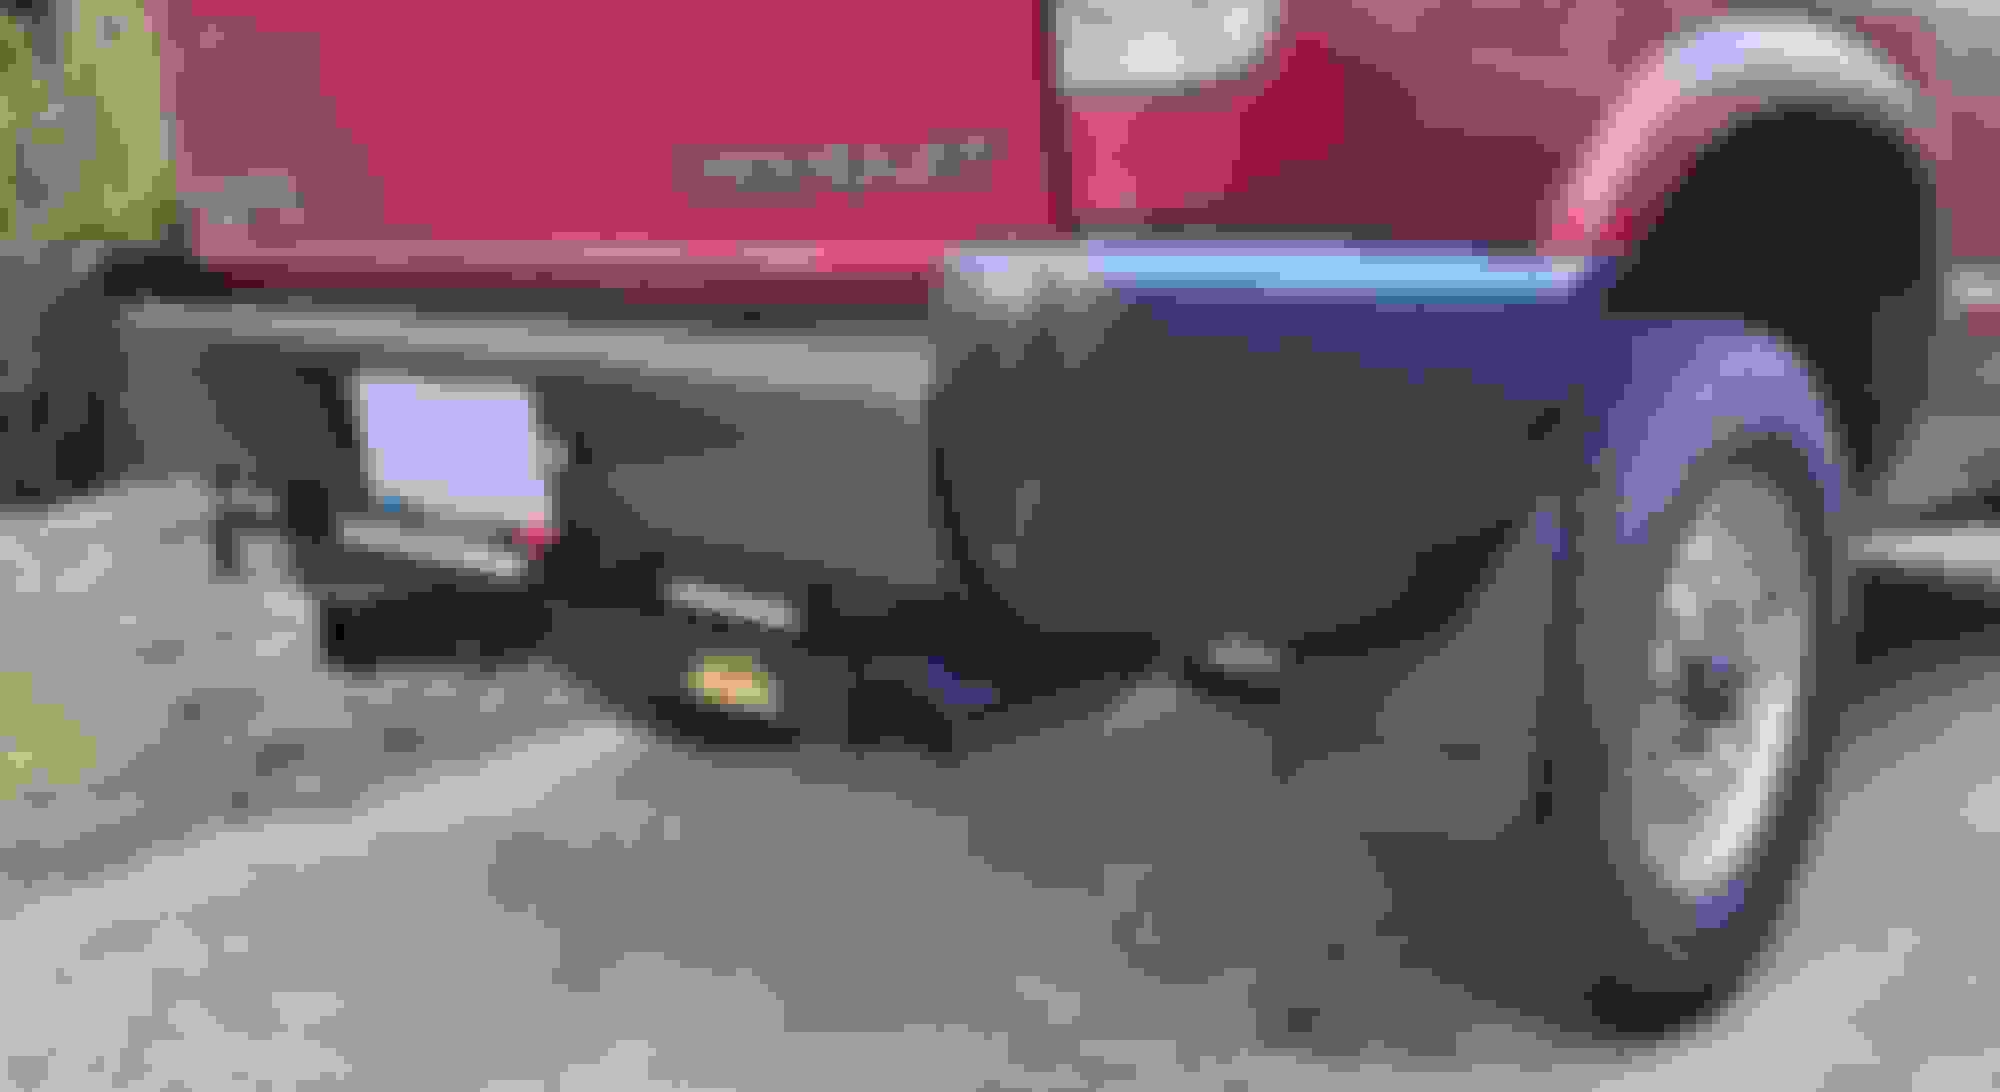
I was about to install rear amber turn signals and noticed a lot more rust than I'd like on the back. So I went crazy on removing rust and applied fluid film on the rear bumper parts. Doing the rest of the coating for the body later today.
Evapo-rust is what I use to remove rust from small parts. Then I usually blue them with "Birchwood Perma Blue". In this case I only used fluid film over them to prevent rusting again for a long while.
Also added a new exhaust tip. Gives a nice look. Also sounds nice.
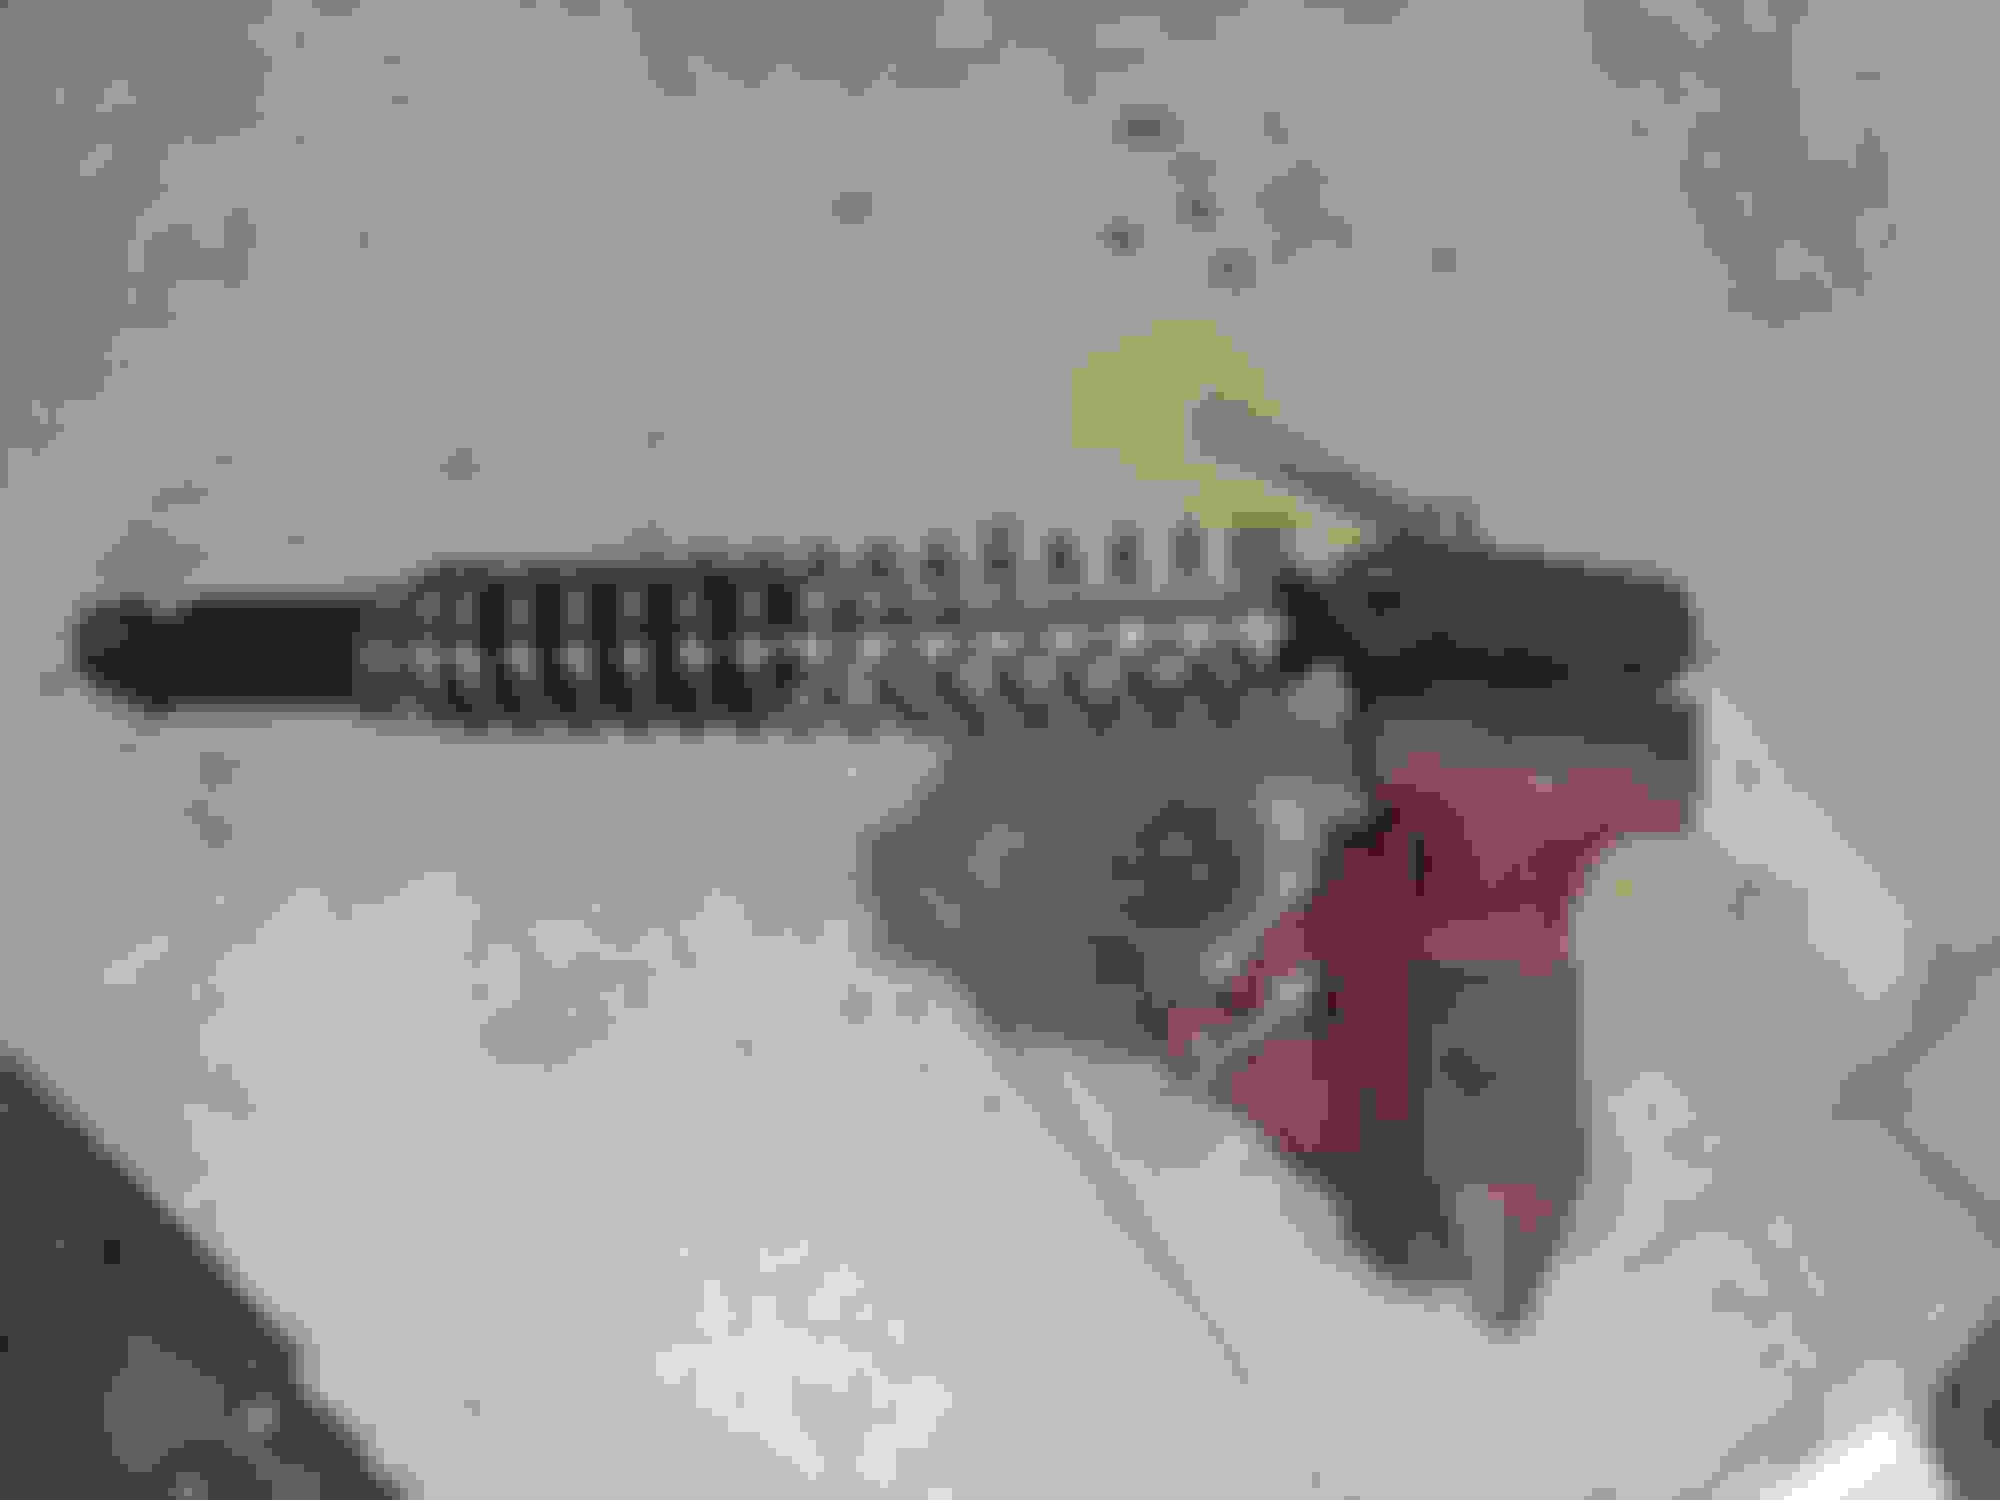
Drilled out the sleeves on a new set of coil-over shocks for the front of my 2003 Blazer 4x4. I did this mod back in 2012 and felt it was time for a fresh set.
The factory bolt size for the Blazer is 1/2 inch, so I had to open the sleeves up by using a vise and then starting with a 31/64 inch bit to drill it slightly larger and then once more with a 1/2 inch bit to get to the final size, drilling them out with two steps keeps the metal from over heating which could cause melting of the bushings, I also used WD40 while drilling to keep the drill lubed. I posted about this front coil-over mod the first time that I did this back in 2012 if anyone is interested in reading more about it. Front Coil-over Shock Mod
I was about to install rear amber turn signals and noticed a lot more rust than I'd like on the back. So I went crazy on removing rust and applied fluid film on the rear bumper parts. Doing the rest of the coating for the body later today.
Evapo-rust is what I use to remove rust from small parts. Then I usually blue them with "Birchwood Perma Blue". In this case I only used fluid film over them to prevent rusting again for a long while.
...
How do you apply the Fluid Film? Looks like a good preventative measure I should start doing.
Drilled out the sleeves on a new set of coil-over shocks for the front of my 2003 Blazer 4x4. I did this mod back in 2012 and felt it was time for a fresh set.
The factory bolt size for the Blazer is 1/2 inch, so I had to open the sleeves up by using a vise and then starting with a 31/64 inch bit to drill it slightly larger and then once more with a 1/2 inch bit to get to the final size, drilling them out with two steps keeps the metal from over heating which could cause melting of the bushings, I also used WD40 while drilling to keep the drill lubed. I posted about this front coil-over mod the first time that I did this back in 2012 if anyone is interested in reading more about it. Front Coil-over Shock Mod
How do you apply the Fluid Film? Looks like a good preventative measure I should start doing.
It sprays on. Clean/degrease the surfaces you want to coat, let the areas dry and then spray away. Keep it off of high-heat areas. Note that it does wash off if you put it on anything in or near the wheel wells.
There's tons of tutorials on Youtube that will explain it better. It's more time spent prepping like anything else.
Only "con" is that the stuff is very messy, so be sure to cover everything you don't want the stuff on (including the garage floor), and wear clothing you don't care about. It also has an odor that some find offensive. I don't mind it though.
Also it's always wet/greasy, so doing any sort of work on the areas that it's sprayed makes the job very messy. However...I'd rather work with the fluid film than deal with anything rusted together.
 09-02-2023, 08:11 PM