
Cadillac ATS front seat swap


Thread Starter
|
Super Member
Joined: Apr 2014
Posts: 1,968
From: Lake City, Florida

Well, here's the seats installed with the newly welded up tracks 
This is with the seats raised to its full height, so the track is fully exposed. It almost disappears when the seat is lowered back down all the way, which is honestly where I have it when I drive, and they still sit up a little higher than the old worn out original cloth non adjustable seats. But I've always felt that the S10's and Blazers just have the driver sitting low in the seat... but I'm also not very tall... neither is the wife... so hey the extra height adjustment is nice to have!
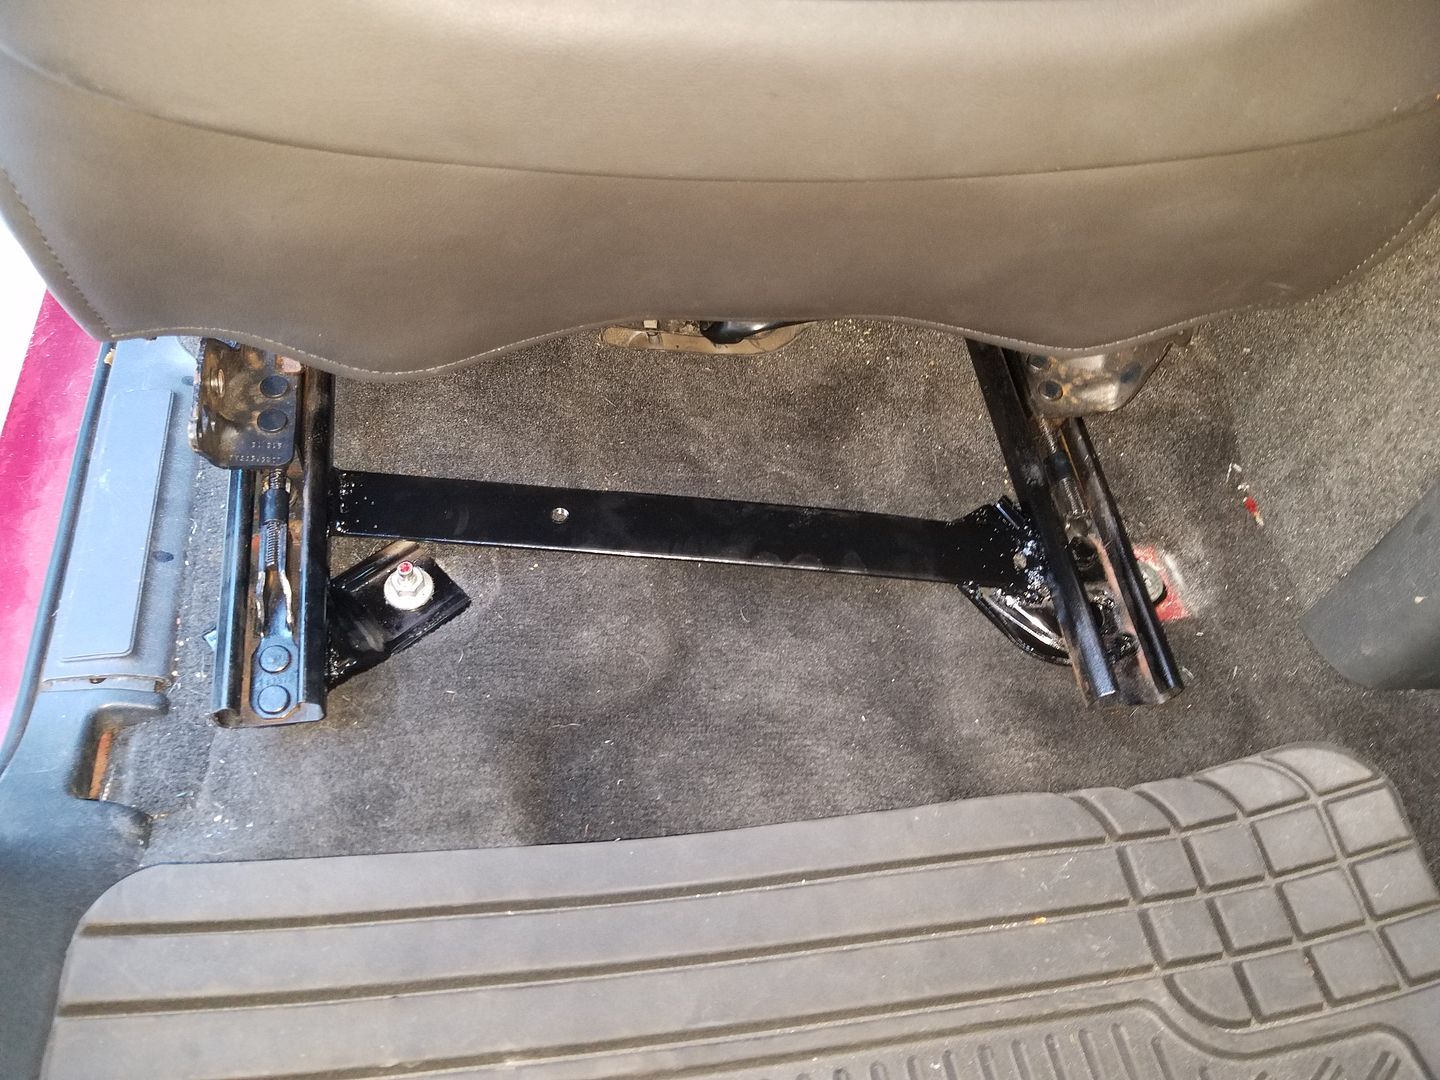
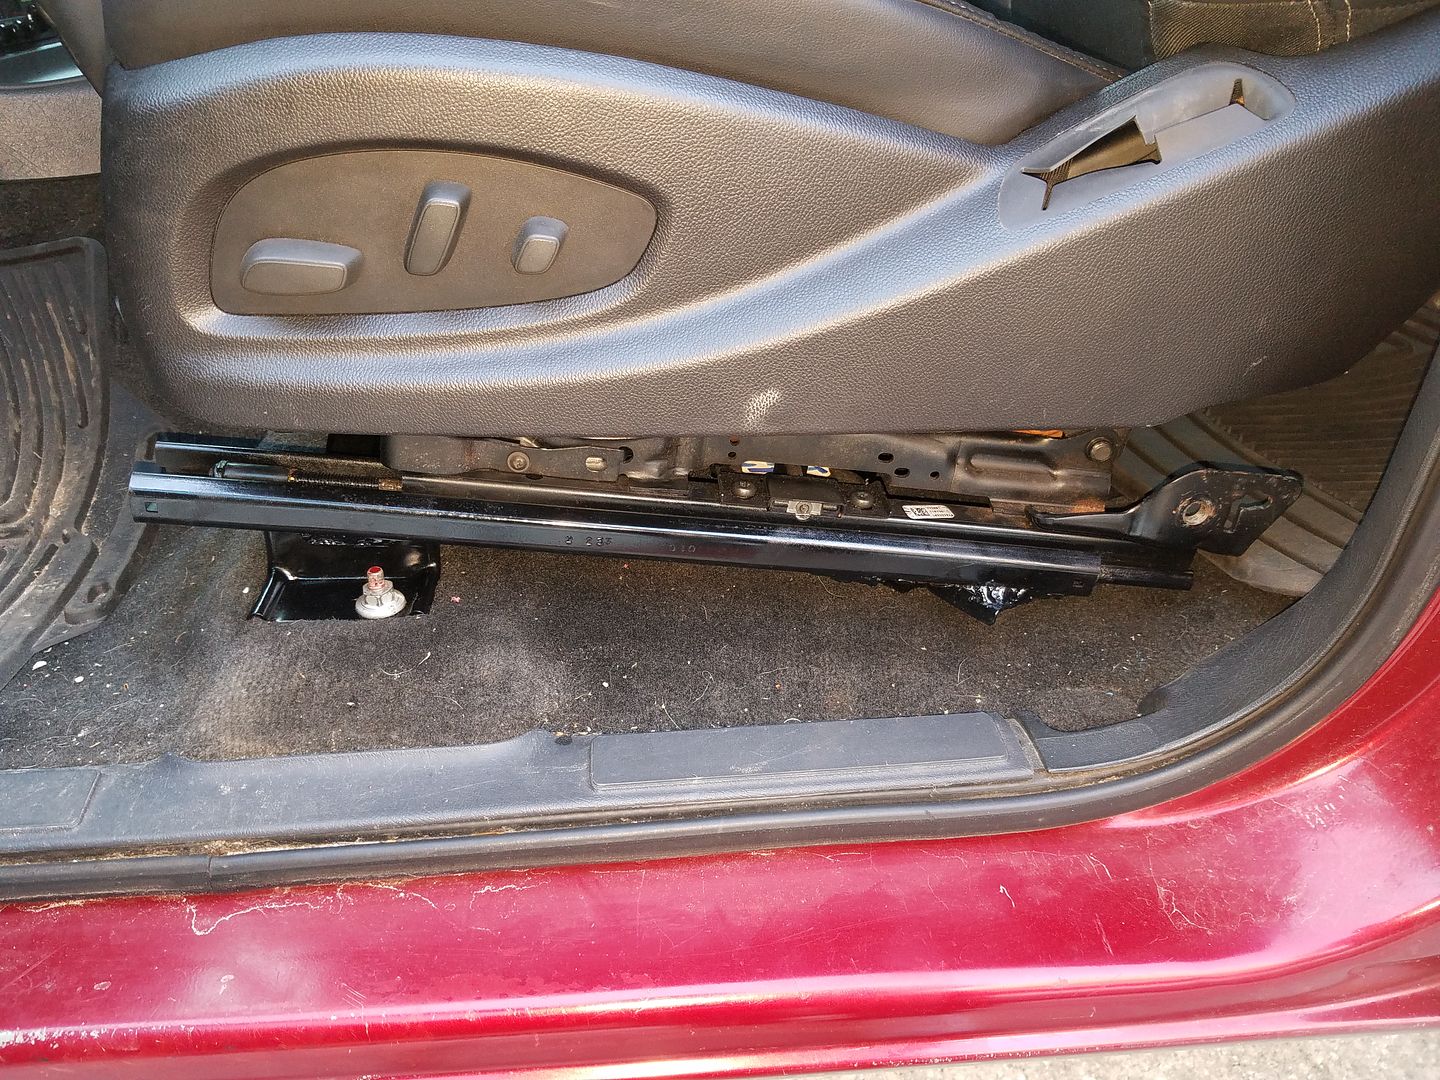
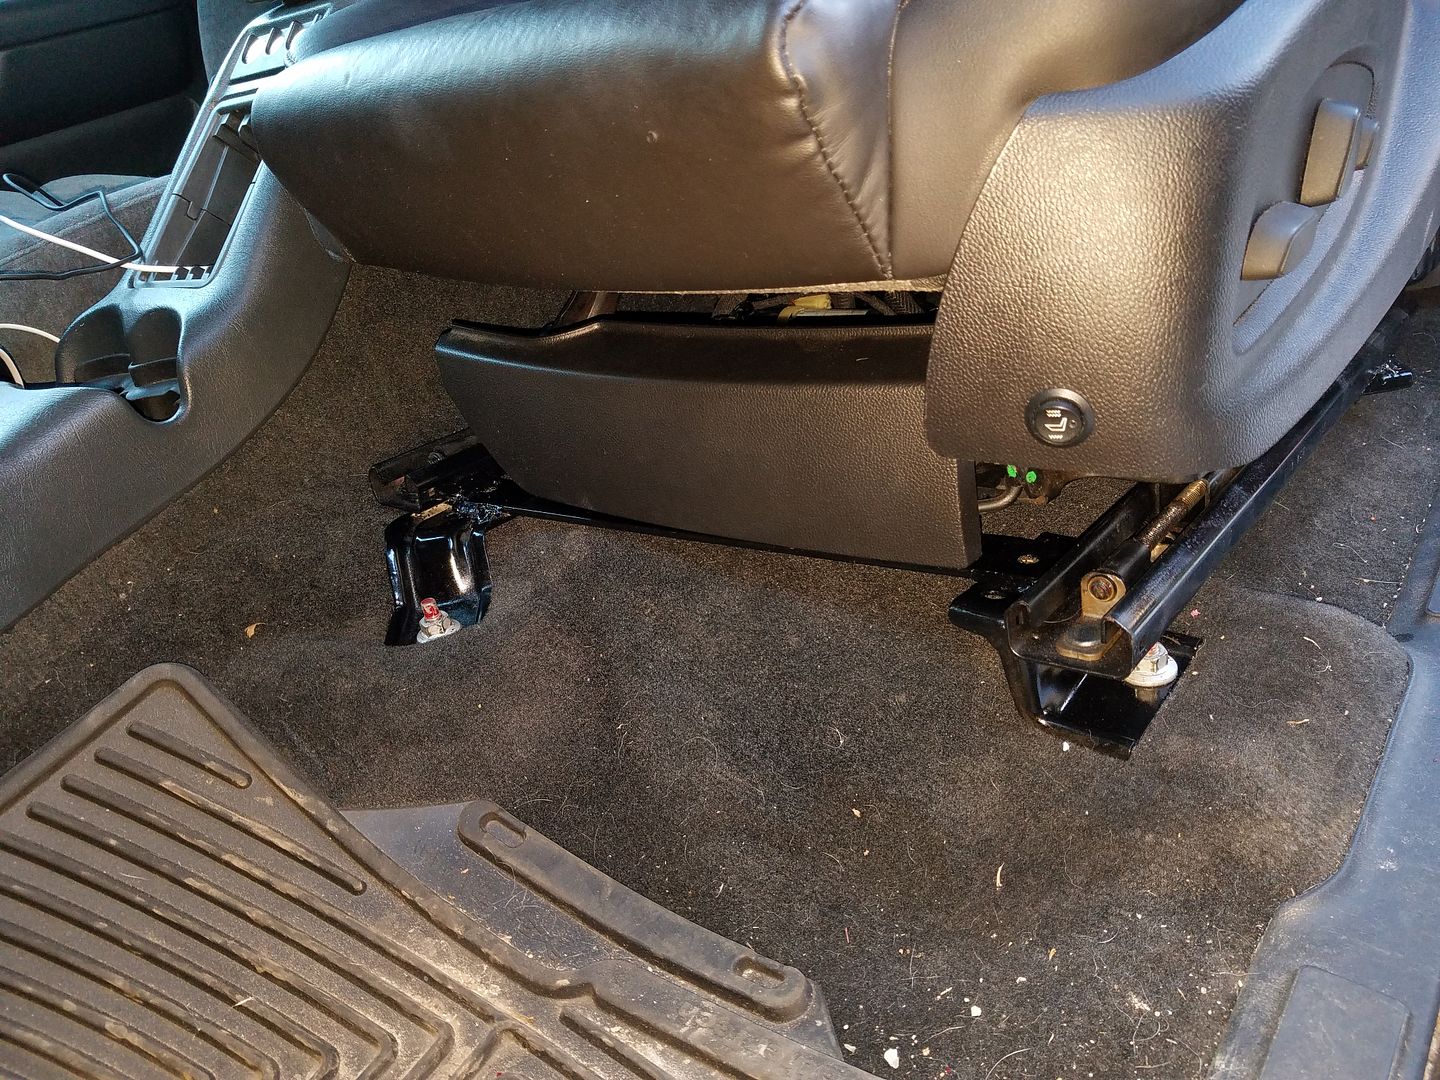
Now I just need to bust out the passenger side!
This is with the seats raised to its full height, so the track is fully exposed. It almost disappears when the seat is lowered back down all the way, which is honestly where I have it when I drive, and they still sit up a little higher than the old worn out original cloth non adjustable seats. But I've always felt that the S10's and Blazers just have the driver sitting low in the seat... but I'm also not very tall... neither is the wife... so hey the extra height adjustment is nice to have!
Now I just need to bust out the passenger side!
Last edited by blazen_red_4x4; Mar 5, 2019 at 09:24 PM.
Thread Starter
|
Super Member
Joined: Apr 2014
Posts: 1,968
From: Lake City, Florida
Installed the driver's side Frankenstein seat belt today.
To clear it up before it gets said, this should be just as strong of a belt, if not STRONGER, than the original...
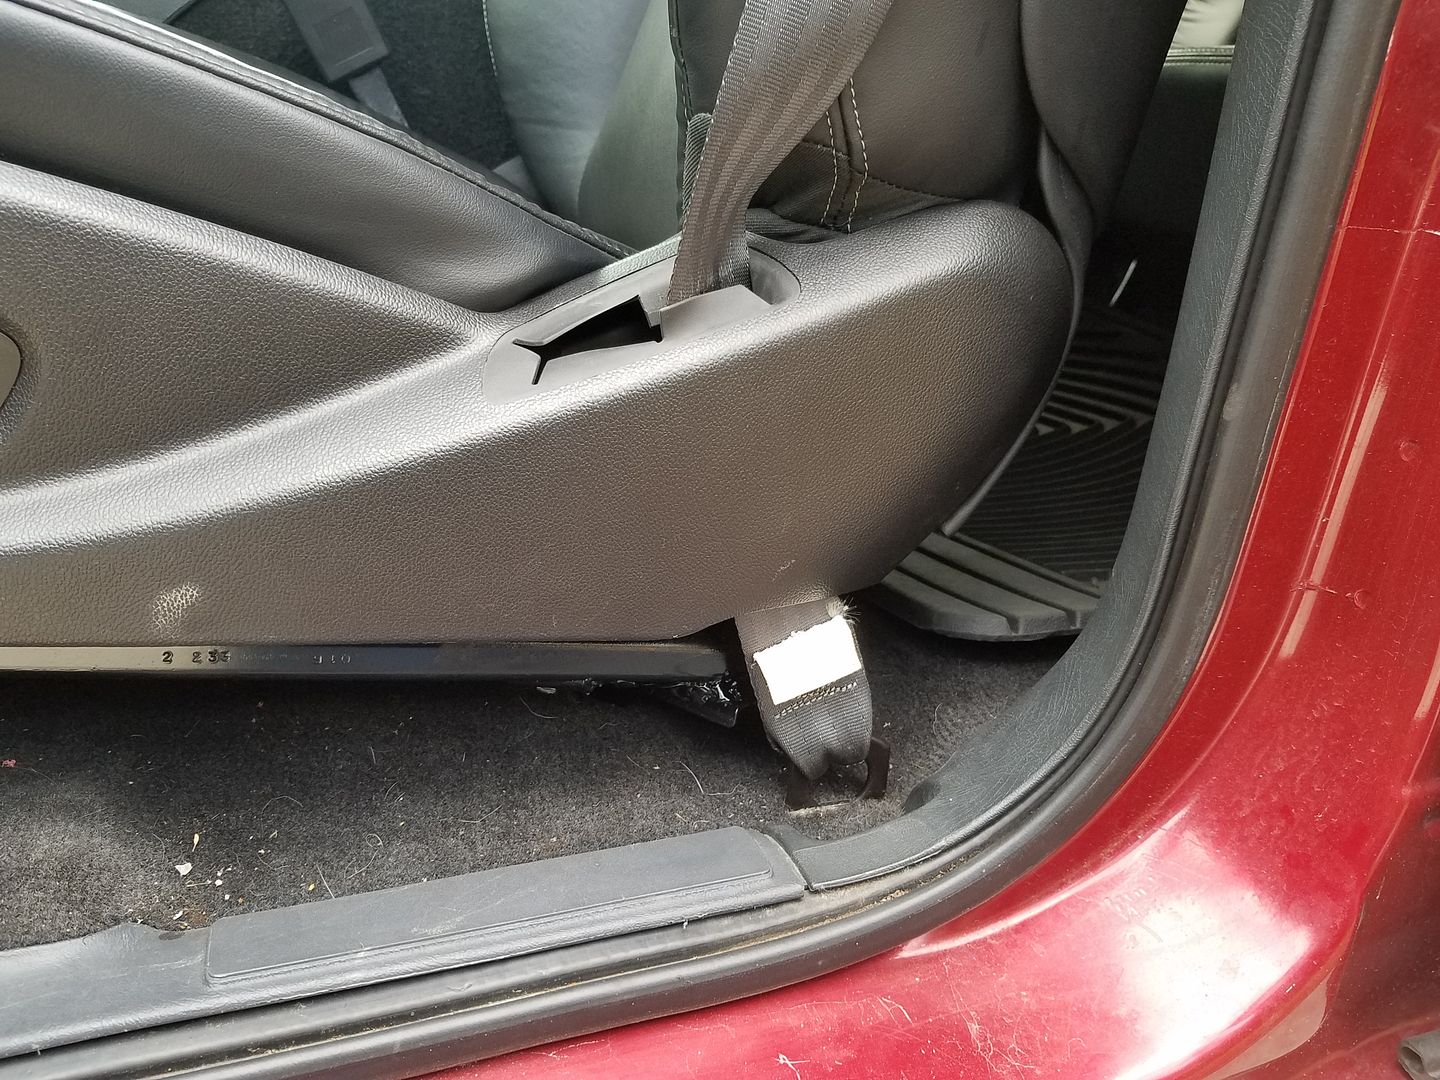
In order to get the belt apart (I used a completely separate belt assembly to modify in case things went south...) I had to actually cut the stitching that holds a little plastic dowel into a loop at the very end of the belt inside the retracter that keeps the belt from slipping through the retracter. Once I had that apart, I could slide the belt out of the retracter, out of the pass through that's on the pillar beside the seat, and slide off the buckle clasp. Then I was left with a bare belt with nothing but the floor mount still sewn in and some parts.
I hit the belt with my electrical pressure and MAN did it ever make a difference... Like a brand new seat belt compared to the 15 year old ones with 209k miles on them that were in the Blazer!
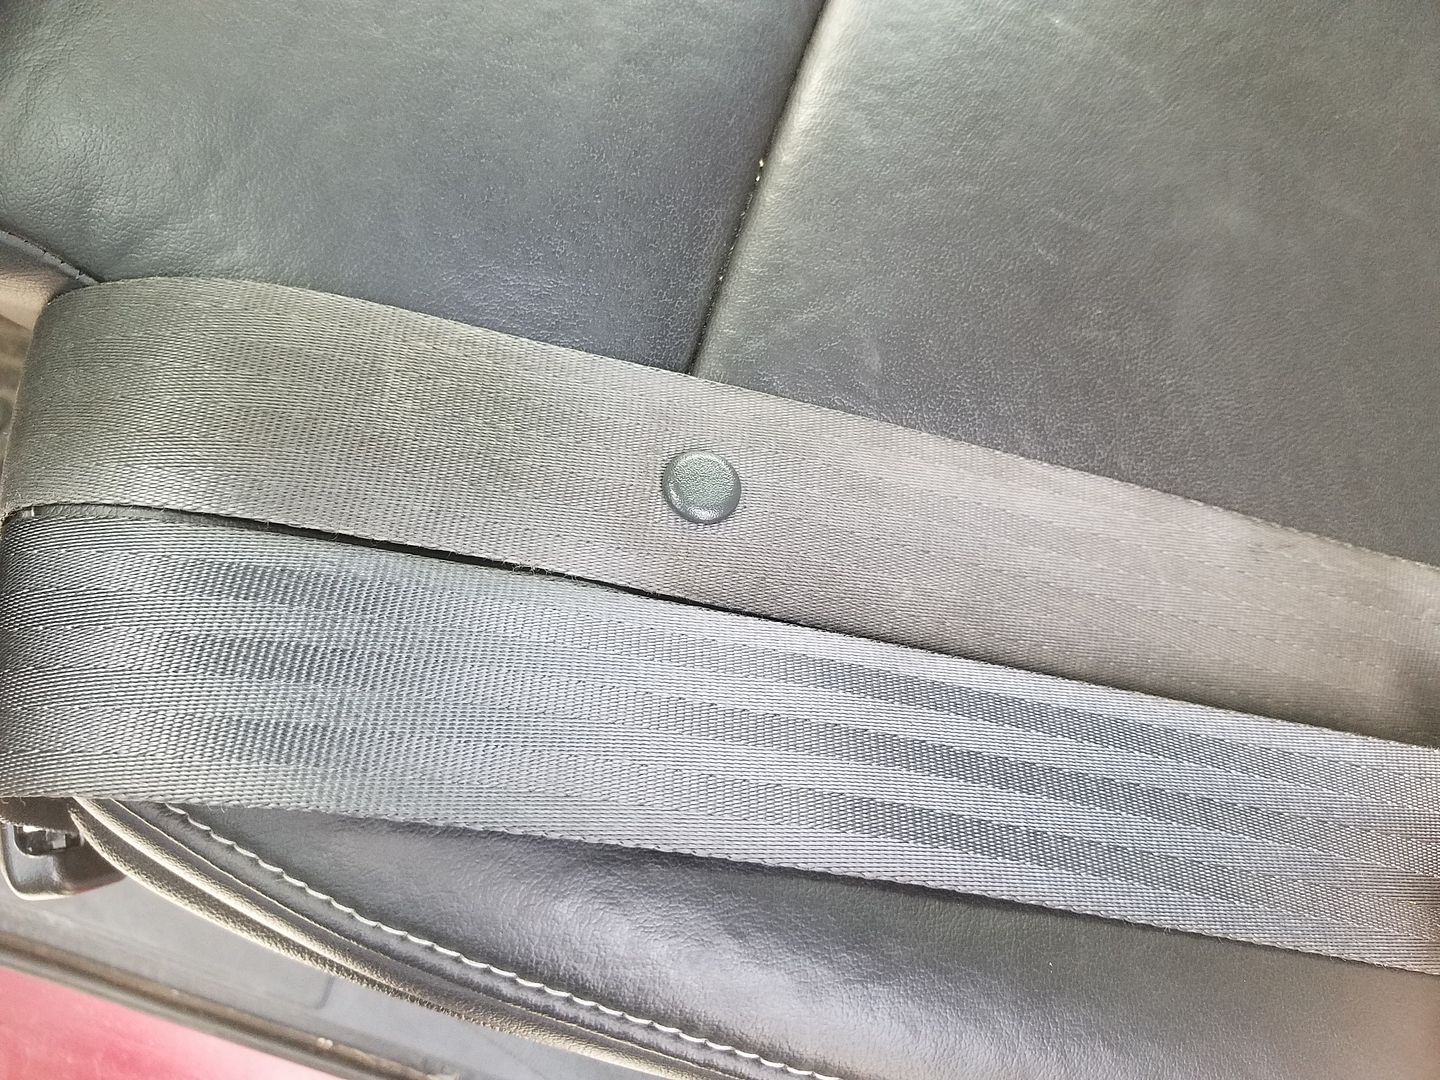
When I put them back together, I used the Cadillac belt clasp (the Blazer clasp actually would lock into the Caddy buckle, but it took some fidgeting...), used the passthrough that goes on the pillar from a 2010 Camaro, routed the belt back into the retracter, made the loop that holds the dowel in that locks the belt into the retracter, and stitched it back together using size 138 bonded nylon threading, which is typically exactly what's used when the seat belts are made. The stuff is THICK, and STRONG, and I had to use a rather large needle to hand thread stitch it together lol. But I put more sticking in that little end loop then there was originally and I can honestly say that I trust it. The way the setup is, in the event of an accident and the belt locks up, the belt is literally going to tighten down on itself and hold tight, there shouldn't even be much, if any, stress on the threads that I had to re-stitch.
BUT, as a disclaimer, I'm not going to tell you do go out there and do this to yours... I'm just explaining what I did in my situation...
In the end though, it looks great and came out fantastic. Works like it's suppose to and everything!
For comparison, this is the stock passenger side still in:
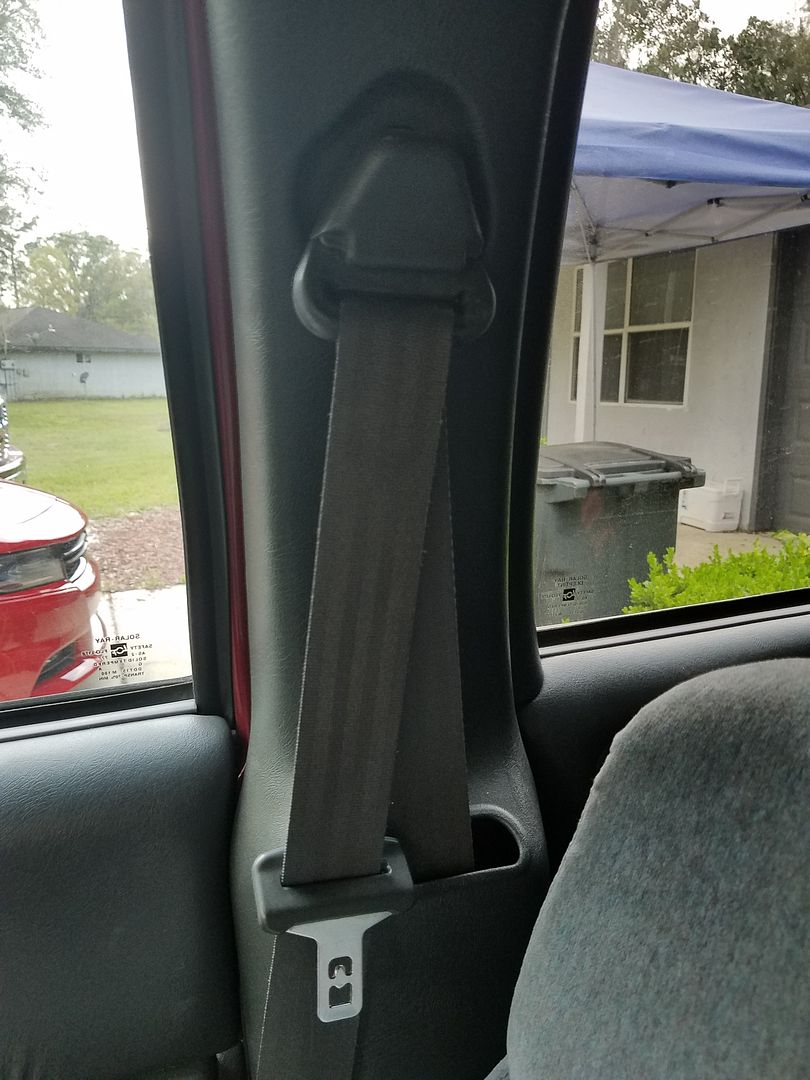
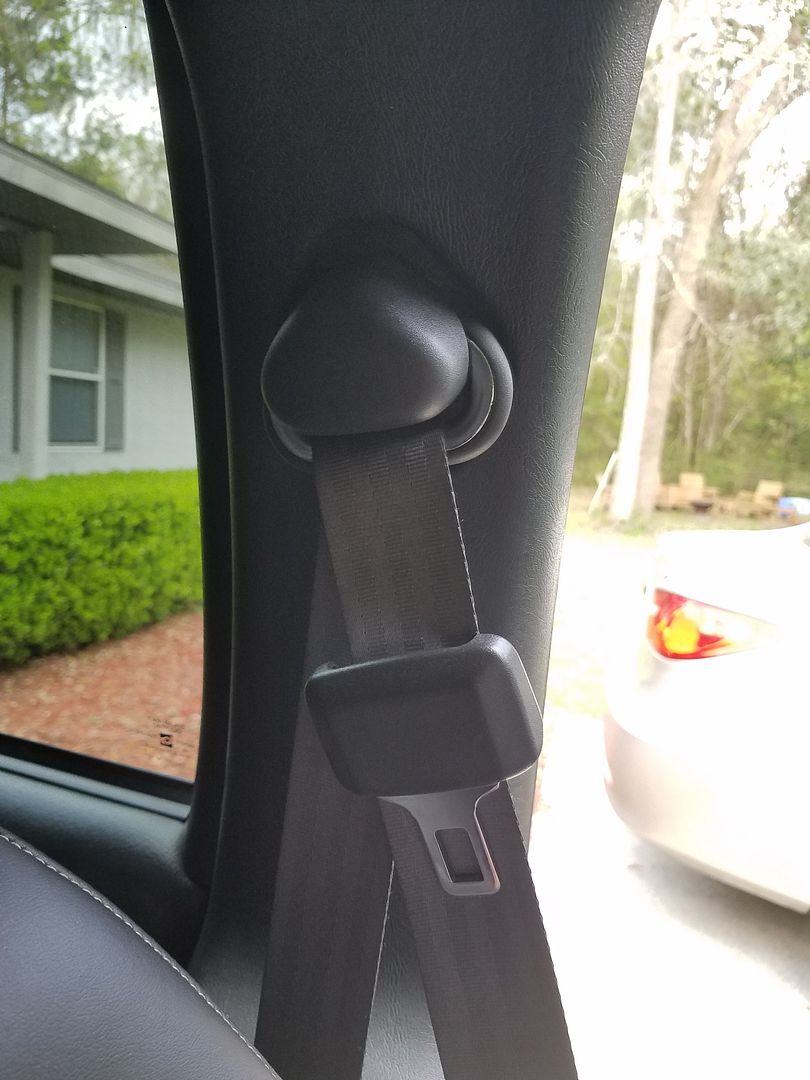
And this is the new modified driver's side:
And I kept the original Blazer floor mount of the belt, whereas the Caddy seats had them originally mounted to the seat. I still passed the belt through the belt slot on the seat for a cleaner look, should not effect it's function at all.
To clear it up before it gets said, this should be just as strong of a belt, if not STRONGER, than the original...
In order to get the belt apart (I used a completely separate belt assembly to modify in case things went south...) I had to actually cut the stitching that holds a little plastic dowel into a loop at the very end of the belt inside the retracter that keeps the belt from slipping through the retracter. Once I had that apart, I could slide the belt out of the retracter, out of the pass through that's on the pillar beside the seat, and slide off the buckle clasp. Then I was left with a bare belt with nothing but the floor mount still sewn in and some parts.
I hit the belt with my electrical pressure and MAN did it ever make a difference... Like a brand new seat belt compared to the 15 year old ones with 209k miles on them that were in the Blazer!
When I put them back together, I used the Cadillac belt clasp (the Blazer clasp actually would lock into the Caddy buckle, but it took some fidgeting...), used the passthrough that goes on the pillar from a 2010 Camaro, routed the belt back into the retracter, made the loop that holds the dowel in that locks the belt into the retracter, and stitched it back together using size 138 bonded nylon threading, which is typically exactly what's used when the seat belts are made. The stuff is THICK, and STRONG, and I had to use a rather large needle to hand thread stitch it together lol. But I put more sticking in that little end loop then there was originally and I can honestly say that I trust it. The way the setup is, in the event of an accident and the belt locks up, the belt is literally going to tighten down on itself and hold tight, there shouldn't even be much, if any, stress on the threads that I had to re-stitch.
BUT, as a disclaimer, I'm not going to tell you do go out there and do this to yours... I'm just explaining what I did in my situation...
In the end though, it looks great and came out fantastic. Works like it's suppose to and everything!
For comparison, this is the stock passenger side still in:
And this is the new modified driver's side:
And I kept the original Blazer floor mount of the belt, whereas the Caddy seats had them originally mounted to the seat. I still passed the belt through the belt slot on the seat for a cleaner look, should not effect it's function at all.

Thread Starter
|
Super Member
Joined: Apr 2014
Posts: 1,968
From: Lake City, Florida
Thanks!
Lol well now that I got the driver's side done, I know exactly how to tackle the passenger side. Probably wont mess with it too much this weekend as I'll be going to Gatornationals drag racing event all day Saturday and will most likely spend Sunday with the misses, although I might at least start on the brackets for the passenger side in the afternoons now that the time changed and I have a little extra daylight after work right now

Thread
Thread Starter
Forum
Replies
Last Post
Nomadicflyer
Full Size K5 (1969-1991) GMT415 (1992-1994) Tech
0
Jan 14, 2018 08:55 AM